Building NFC Scanner iOS App with CoreNFC
Published at Feb 3, 2019
Near-field communication (NFC) is the technology that enables contactless communication between 2 devices within a certain distance (usually about 4 cm).
Nowadays, NFC is being utilized in contactless payment systems, electronic identification card, electronic tickets, and to share information such as contacts, photo, video, or URL. Such labels or cards that can be used to read the information using NFC are called NFC Tags.
According to Wikipedia, there are 3 communication modes that can be performed in a full NFC device:
- NFC card emulation. Enables NFC-enabled devices such as smartphones to act like smart cards, allowing users to perform transactions such as payment or ticketing.
- NFC reader/writer. Enables NFC-enabled devices to read information stored on inexpensive NFC tags embedded in labels or smart posters.
- NFC peer-to-peer. Enables two NFC-enabled devices to communicate with each other to exchange information in an adhoc fashion.
Current State of NFC in iOS
NFC in iOS was started with the release of Apple Pay in 2014. iPhone 7 & iPhone 7 Plus were the first devices with built in NFC hardware that can be used to perform contactless payment using Apple Pay. However, Apple didn’t provide any API for third party developers to use the NFC capability beyond Apple Pay functionality.
In iOS 11, Apple finally introduced the CoreNFC framework that enabled third party developers to read NFC tags within their apps. The API only supports reading NFC tags when the app is running on the foreground.
In iOS 12, with the release of Apple new iPhones: Xr, Xs, Xs Max, Apple finally introduced the ability to scan NFC tags without running the app using those devices. It also handles redirecting the scan to the associated app using Apple Universal Link mechanism.
As of right now, CoreNFC doesn’t have the capability to write to NFC tags. I really wish iOS 13 will provide the capability for third party apps to write to tags as the hardware needed to perform the write is already there.
What We Will Build
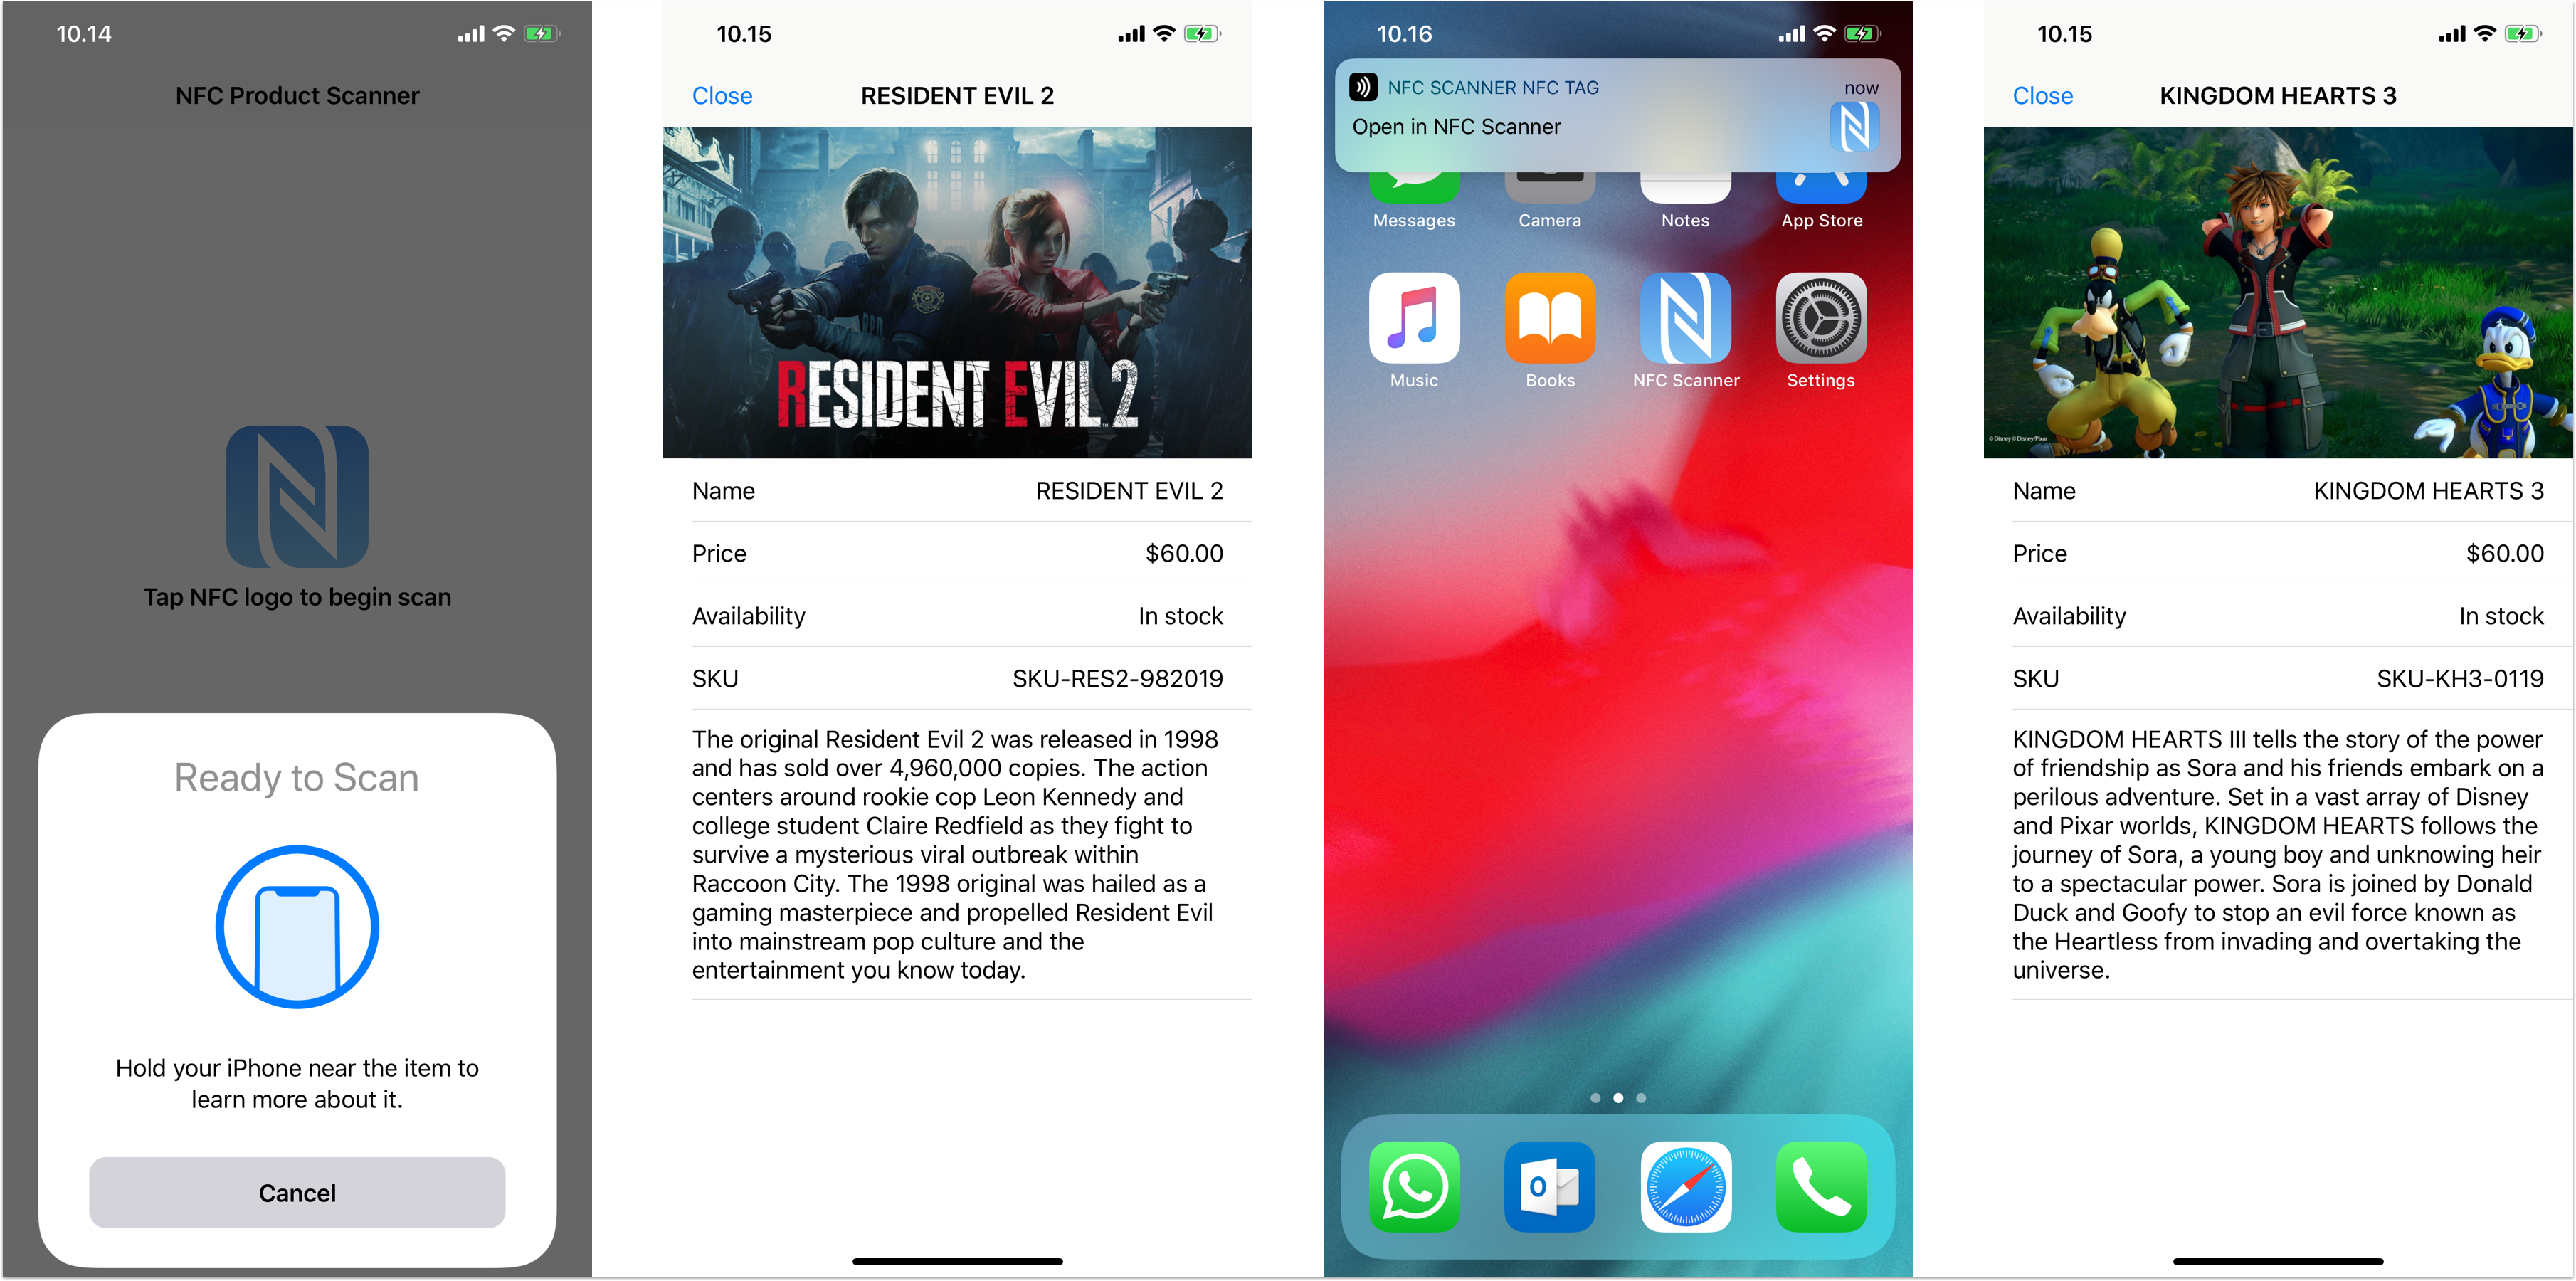
In this tutorial, we are going to build a simple app that act as a product scanner. Here are the main features of the app:
- The app will scan NFC tags and get the associated URL to retrieve the product SKU ID;
- The app then searches its local data store with the particular SKU ID;
- If found, the app will display the details of the product, such as name, image, description, price, and availability;
- Scan NFC tags without running the app by using Apple Universal Link & Firebase Hosting.
Starting the Project
You can clone the starter project source code from the GitHub Repository at alfianlosari/NFCScanneriOSStarter.
The starter project contains all the custom table view cells, assets that we will use in our app UI, and the Product model.
Product Model & Local Data Store
We use a Product model with several attributes to represent a product. Keep in mind that the ID of the product is the unique identifier for each product and it will be used by the store to find the product.
struct Product {

    let id: String
    let name: String
    let description: String
    let price: String
    let inStock: Bool
    let image: UIImage?
}
Next, let’s create the ProductStore class. This is a Singleton object that stores the hardcoded products array in memory. It provides the interface to get the associated product with the given SKU ID. If you want, you can store the product inside the local storage using Core Data, SQLite, or even retrieve it from network.
struct ProductStore {

    static let shared = ProductStore()
    private init() {}

    func product(withID id: String) -> Product? {
        return products.first { $0.id.lowercased() == id.lowercased() }
    }

    let products = [
        Product(id: "SKU-RES2-982019", name: "RESIDENT EVIL 2", description: """
         The action centers around rookie cop Leon Kennedy and college student Claire Redfield as they fight to survive a mysterious viral outbreak within Raccoon City.
    """, price: "$60.00", inStock: true, image: UIImage(named: "res2")),
        Product(id: "SKU-KH3-0119", name: "KINGDOM HEARTS 3", description: """
    KINGDOM HEARTS III tells the story of the power of friendship as Sora and his friends embark on a perilous adventure.
    """, price: "$60.00", inStock: true, image: UIImage(named: "kh3")),
        Product(id: "SKU-IPXSM-2018", name: "iPhone Xs Max", description: """
    The smartest, most powerful chip in a smartphone. And a breakthrough dual-camera system.
    """, price: "$999.00", inStock: false, image: UIImage(named: "xsmax"))
    ]
}
The Main Screen UI
The main screen contains only the single UILabel and UIButton for the user to tap and begin the NFC scanning session. All the code for the main screen is written within the MainViewController. Later, we will add the handler inside the scanTapped: method to begin our scanning session.
The Product Detail Screen UI

The product detail screen is a subclass of UITableViewController. It will populate the rows using the product passed from the presenting view controller. The screen displays the name, image, description, and availability of a product. The code is contained in ProductViewController class.
Prepare NFC Tags with Related SKU ID
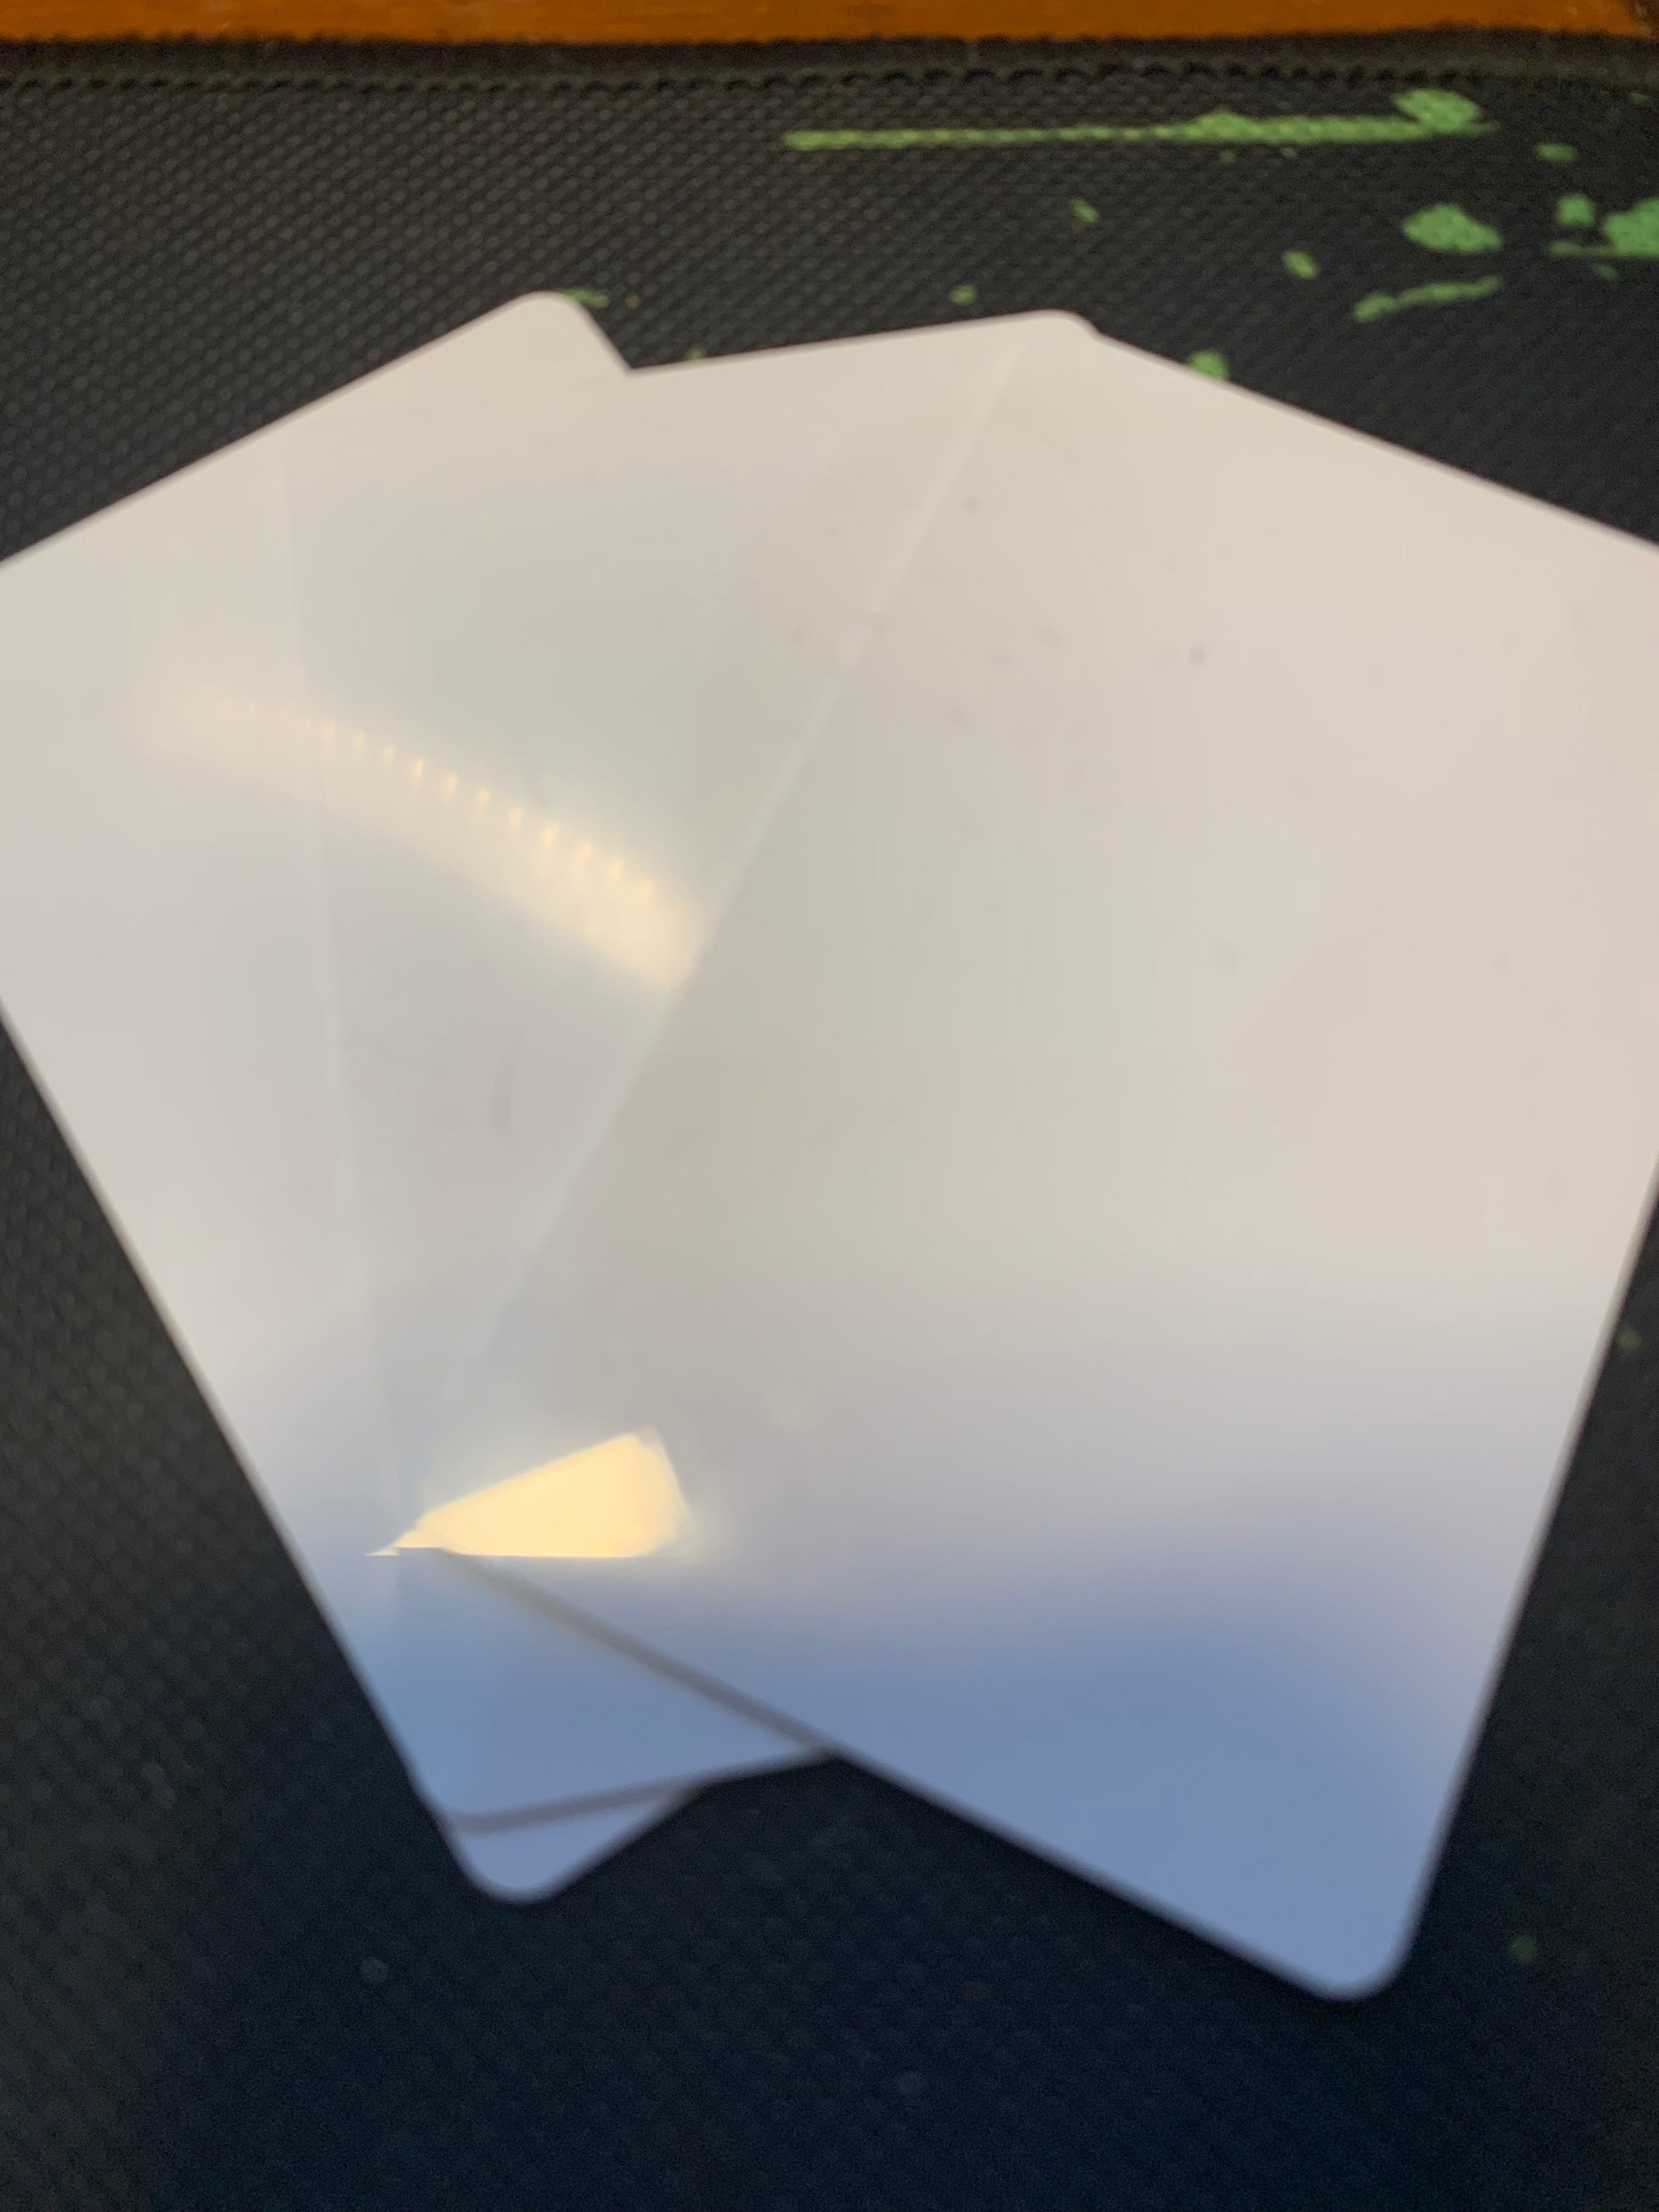
To perform this step, you need to buy NFC tags that you can use to write to. To write data to the tags, you can use an Android phone that has a NFC capability. You can use various app from the Google Play Store to write the SKU ID to the tags. Here is the link for the app I used NFC Tools - Apps on Google Play].
You need to write the SKU in the following format:
https://example.com/$SKU_ID
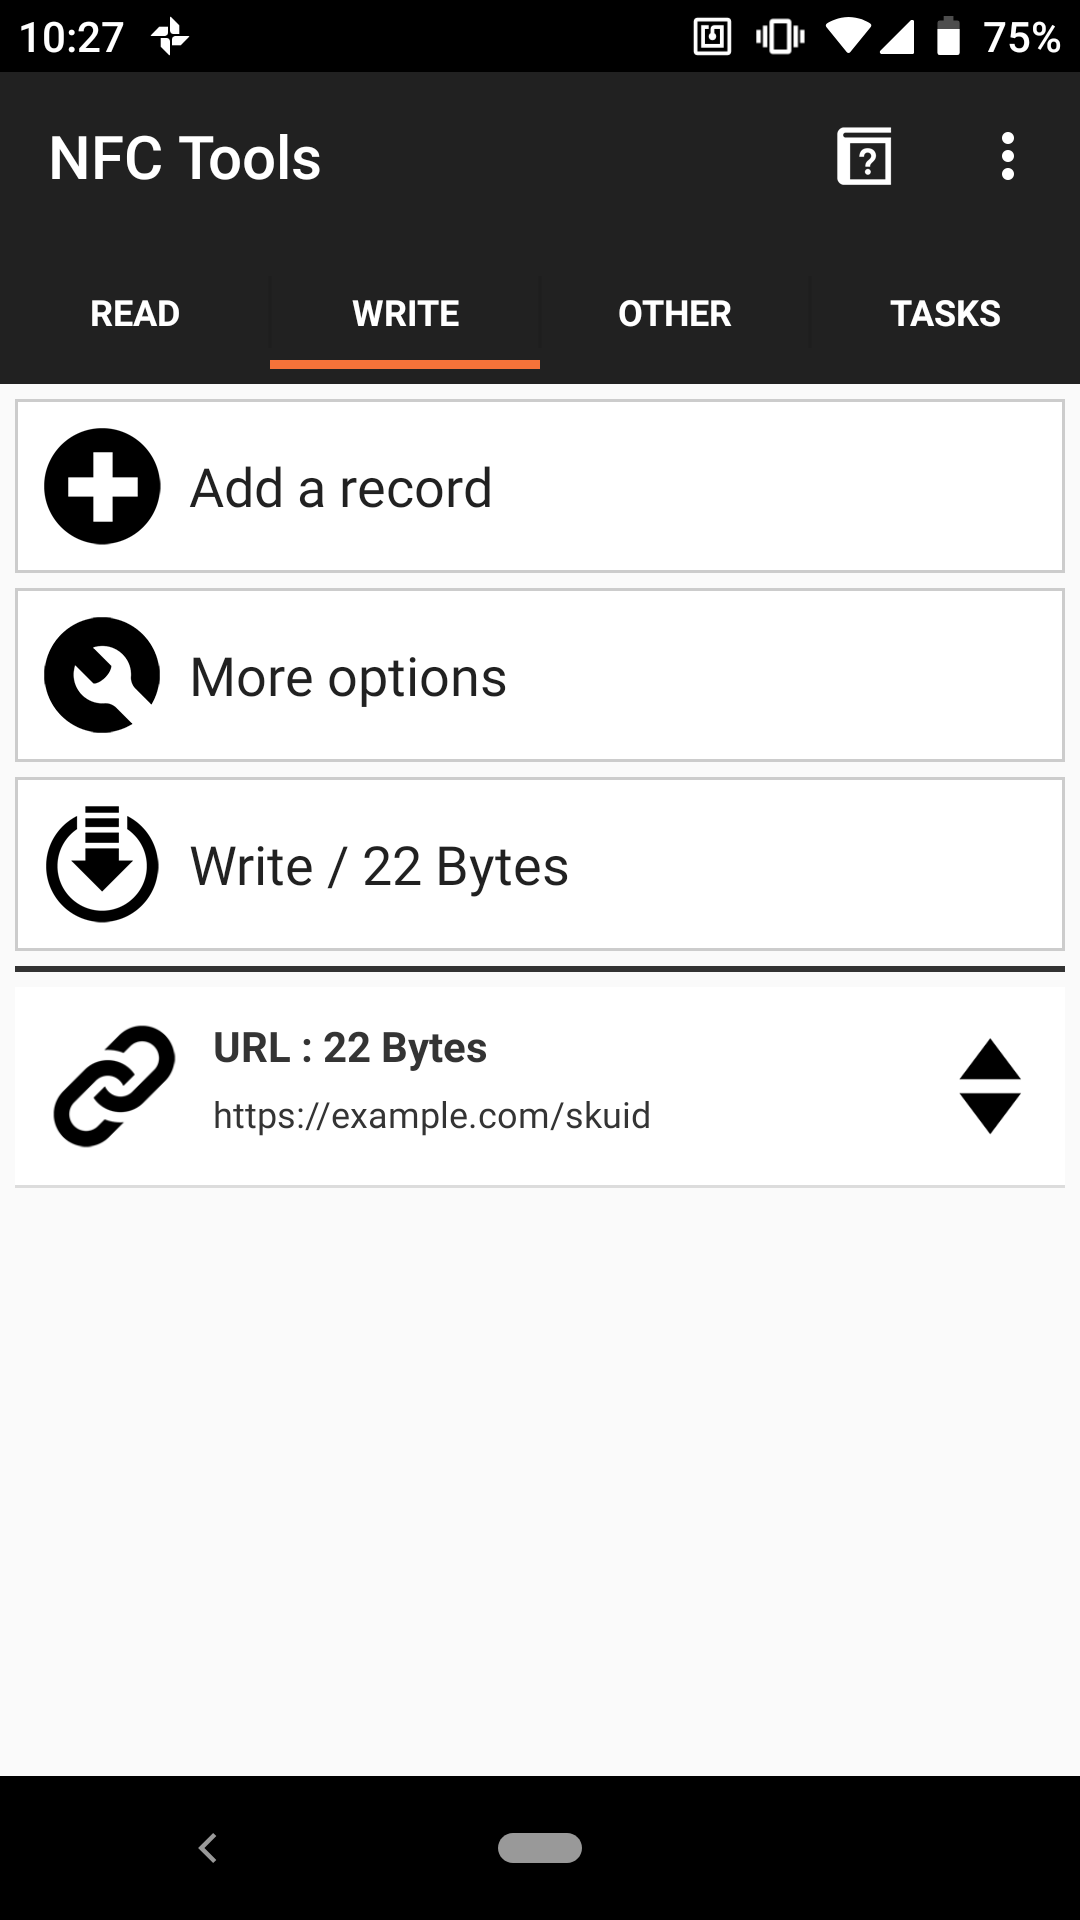
The app will read the tags that contain payload with an URI format. Then, it will get the last path of the URI. In this case, the last path will be the SKU ID of the product. Use the SKU ID from one of the products above as a test.
Using Core NFC API to Start Scanning Session
Let’s start writing the actual code to begin the NFC scanning session. With the SDK, you will be amazed how simple it is to implement NFC in your iOS apps. Here is the sample code:
import UIKit
import CoreNFC

class MainViewController: UIViewController {

    var session: NFCNDEFReaderSession?
    var productStore = ProductStore.shared

    @IBAction func scanTapped(_ sender: Any) {
        guard session == nil else {
            return
        }
        session = NFCNDEFReaderSession(delegate: self, queue: nil, invalidateAfterFirstRead: true)
        session?.alertMessage = "Hold your iPhone near the item to learn more about it."
        session?.begin()
    }

    override func viewWillDisappear(_ animated: Bool) {
        super.viewWillDisappear(animated)
        session = nil
    }

}

extension MainViewController: NFCNDEFReaderSessionDelegate {


    // MARK: - NFCNDEFReaderSessionDelegate

    /// - Tag: processingTagData
    func readerSession(_ session: NFCNDEFReaderSession, didDetectNDEFs messages: [NFCNDEFMessage]) {

        guard
            let ndefMessage = messages.first,
            let record = ndefMessage.records.first,
            record.typeNameFormat == .absoluteURI || record.typeNameFormat == .nfcWellKnown,
            let payloadText = String(data: record.payload, encoding: .utf8),
            let sku = payloadText.split(separator: "/").last else {
                return
        }


        self.session = nil

        guard let product = productStore.product(withID: String(sku)) else {
            DispatchQueue.main.asyncAfter(deadline: .now() + 3) { [weak self] in
                let alertController = UIAlertController(title: "Info", message: "SKU Not found in catalog",preferredStyle: .alert)
                alertController.addAction(UIAlertAction(title: "OK", style: .default, handler: nil))
                self?.present(alertController, animated: true, completion: nil)
            }
            return
        }

        DispatchQueue.main.asyncAfter(deadline: .now() + 3) { [weak self] in
            self?.presentProductViewController(product: product)
        }
    }

    func presentProductViewController(product: Product) {
        let vc = storyboard!.instantiateViewController(withIdentifier: "ProductViewController") as! ProductViewController
        vc.product = product
        let navVC = UINavigationController(rootViewController: vc)
        navVC.modalPresentationStyle = .formSheet
        present(navVC, animated: true, completion: nil)
    }


    /// - Tag: endScanning
    func readerSession(_ session: NFCNDEFReaderSession, didInvalidateWithError error: Error) {
        // Check the invalidation reason from the returned error.
        if let readerError = error as? NFCReaderError {
            // Show an alert when the invalidation reason is not because of a success read
            // during a single tag read mode, or user canceled a multi-tag read mode session
            // from the UI or programmatically using the invalidate method call.
            if (readerError.code != .readerSessionInvalidationErrorFirstNDEFTagRead)
                && (readerError.code != .readerSessionInvalidationErrorUserCanceled) {
                let alertController = UIAlertController(
                    title: "Session Invalidated",
                    message: error.localizedDescription,
                    preferredStyle: .alert
                )
                alertController.addAction(UIAlertAction(title: "OK", style: .default, handler: nil))
                DispatchQueue.main.async {
                    self.present(alertController, animated: true, completion: nil)
                }
            }
        }

        // A new session instance is required to read new tags.
        self.session = nil
    }

}
First, we need to import CoreNFC at the top of the file and declare a property to store the NFCNDEFReaderSession object. Inside the scanTapped: method, we initialize the scanning session with an alert message for detecting NFC Data Exchange Format (NDEF) tags. You do not need to worry about the UI of the scanning session which will be provided by the framework. You only need to set the delegate to be notified when the tags are found. Also, you have to provide the delegates to handle errors. In this case, we set the MainViewController as the delegate.
The MainViewController class needs to implement the NFCNDEFReaderSessionDelegate protocol. There are 2 required methods to implement:
- readerSession(session: NFCNDEFReaderSession, didDetectNDEFs messages:): It will be invoked when the session finds a new tag.
- readerSession(_session: NFCNDEFReaderSession, didInvalidateWithError error: Error): It will be invoked when an error has occurred or the scanning session has ended.
Here are the steps we perform inside the processing tag method:
- Make sure to check if the message and record is available.
- Check if the record format is a type of URI of NFCWellKnown.
- Initialize the string using the payload data.
- Get the last path component of the URI containing the SKU ID.
- Query the Product Store passing the SKU ID to retrieve the associated product.
- If the product is found, we present the ProductViewController passing the product.
- If product is not found, we display an alert informing the user that the SKU for the tags is not found.
If an error occurs or the scanning session has ended, we will:
- Check if the error exists and make sure the error is not triggerd by the user’s action; and
- Display an alert telling that the scanning session has been invalidated.
Build and run the app. Tap the begin scan button, and then tap your tags. It should present the product detail screen related to the SKU ID it read from the tag.

Implementing Background NFC Scan Using Apple Universal Link
To implement the background NFC scan, you need to have a valid URL domain that hosts the AASA (apple-app-site-association) file. This file will be used to associate your website domain with the app. The file will contain the app’s Bundle ID and the path that allows the app to access.
Here is the format of the file, it’s using JSON structure. Remember to replace the following appID with your Bundle ID. The prefix JFGXEWX is the Team ID. For testing purpose, we will just allow the app to access all the paths using the wildcard “*”.
{
  "applinks": {
    "apps": [],
    "details": [
      {
        "appID": “JFGXEWX.com.alfianlosari.NFCProductScanner",
        "paths": [
          "*"
        ]
      }
    ]
  }
}
The next step is to host the file in your domain by uploading the file to your server. Put the file either at https://<<yourdomain>>/apple-app-site-association or at https://<<yourdomain>>/.well-known/apple-app-site-association. Make sure your domain support https and you upload the file without the json extension. You can use the free domain hosting services like Firebase Hosting, GitHub Hosting, or many other free options to host the file.
The last step is to add the associated domains inside the project’s Xcode Capabilities Tab.

The format of the associated domain is applinks:YOUR_DOMAIN.
Handling Background Reading of NFC inside App Delegate
You can test the background scan using the NFC tags. Make sure you have written the URL in your NFC Tag with the format of https://YOURDOMAIN/SKUID.
In home screen, tap the NFC tags and it should display a notification banner that you can tap on. The system will redirect it automatically to your app using the Apple Universal Link which we have set up earlier.
The app will just display the main UI and do nothing. In order to let the app respond appropriately from the background scan, we need to override the continueUserActivity method in AppDelegate:
import UIKit

@UIApplicationMain
class AppDelegate: UIResponder, UIApplicationDelegate {

    var window: UIWindow?
    var productStore = ProductStore.shared

    func application(_ application: UIApplication, didFinishLaunchingWithOptions launchOptions: [UIApplication.LaunchOptionsKey: Any]?) -> Bool {
        return true
    }

    func application(_ application: UIApplication, continue userActivity: NSUserActivity, restorationHandler: @escaping ([UIUserActivityRestoring]?) -> Void) -> Bool {
        guard userActivity.activityType == NSUserActivityTypeBrowsingWeb else {
            return false
        }

        // Confirm that the NSUserActivity object contains a valid NDEF message.
        let ndefMessage = userActivity.ndefMessagePayload

        guard
            let record = ndefMessage.records.first,
            record.typeNameFormat == .absoluteURI || record.typeNameFormat == .nfcWellKnown,
            let payloadText = String(data: record.payload, encoding: .utf8),
            let sku = payloadText.split(separator: "/").last else {
                return false
        }

        guard let product = productStore.product(withID: String(sku)) else {
            return false
        }


        guard let navigationController = window?.rootViewController as? UINavigationController else {
            return false
        }

        navigationController.dismiss(animated: true, completion: nil)
        let mainVC = navigationController.topViewController as? MainViewController
        mainVC?.presentProductViewController(product: product)
        return true
    }


}
Let’s look into the tasks we perform inside this method.
- Check if the user activity type is the type of NSUserActivityTypeBrowsingWeb.
- Check if the message payload and record exists from the user activity ndefMessagePayload property.
- Check if the record type is in URI or NFCWellKnown format.
- Extract the string from the record payload data.
- Get the SKU ID from the last path component.
- Query the product store with the SKU ID.
- If found, we retrieve the MainViewController from the window root view controller and invoke the present product detail screen passing the product.
Run and build the project. Then, scan the tags from the home screen and tap the notification banner. The app should open the corresponding product detail screen.

Conclusion
Congratulations! We finally finished building our NFC product scanner iOS app. This technology is really useful when you want to communicate and pass data easily. It’s useful for commerce business, payment system, and many more industries. Let’s hope Apple will add the capability to write to NFC tags in iOS 13 later this year. Happy Swifting 😋!
Here is the completed source code for the project on GitHub repository at alfianlosari/CoreNFCScanneriOS.