Building Cross-Platform macOS and iOS Image Filter SwiftUI App
Published at Mar 16, 2020
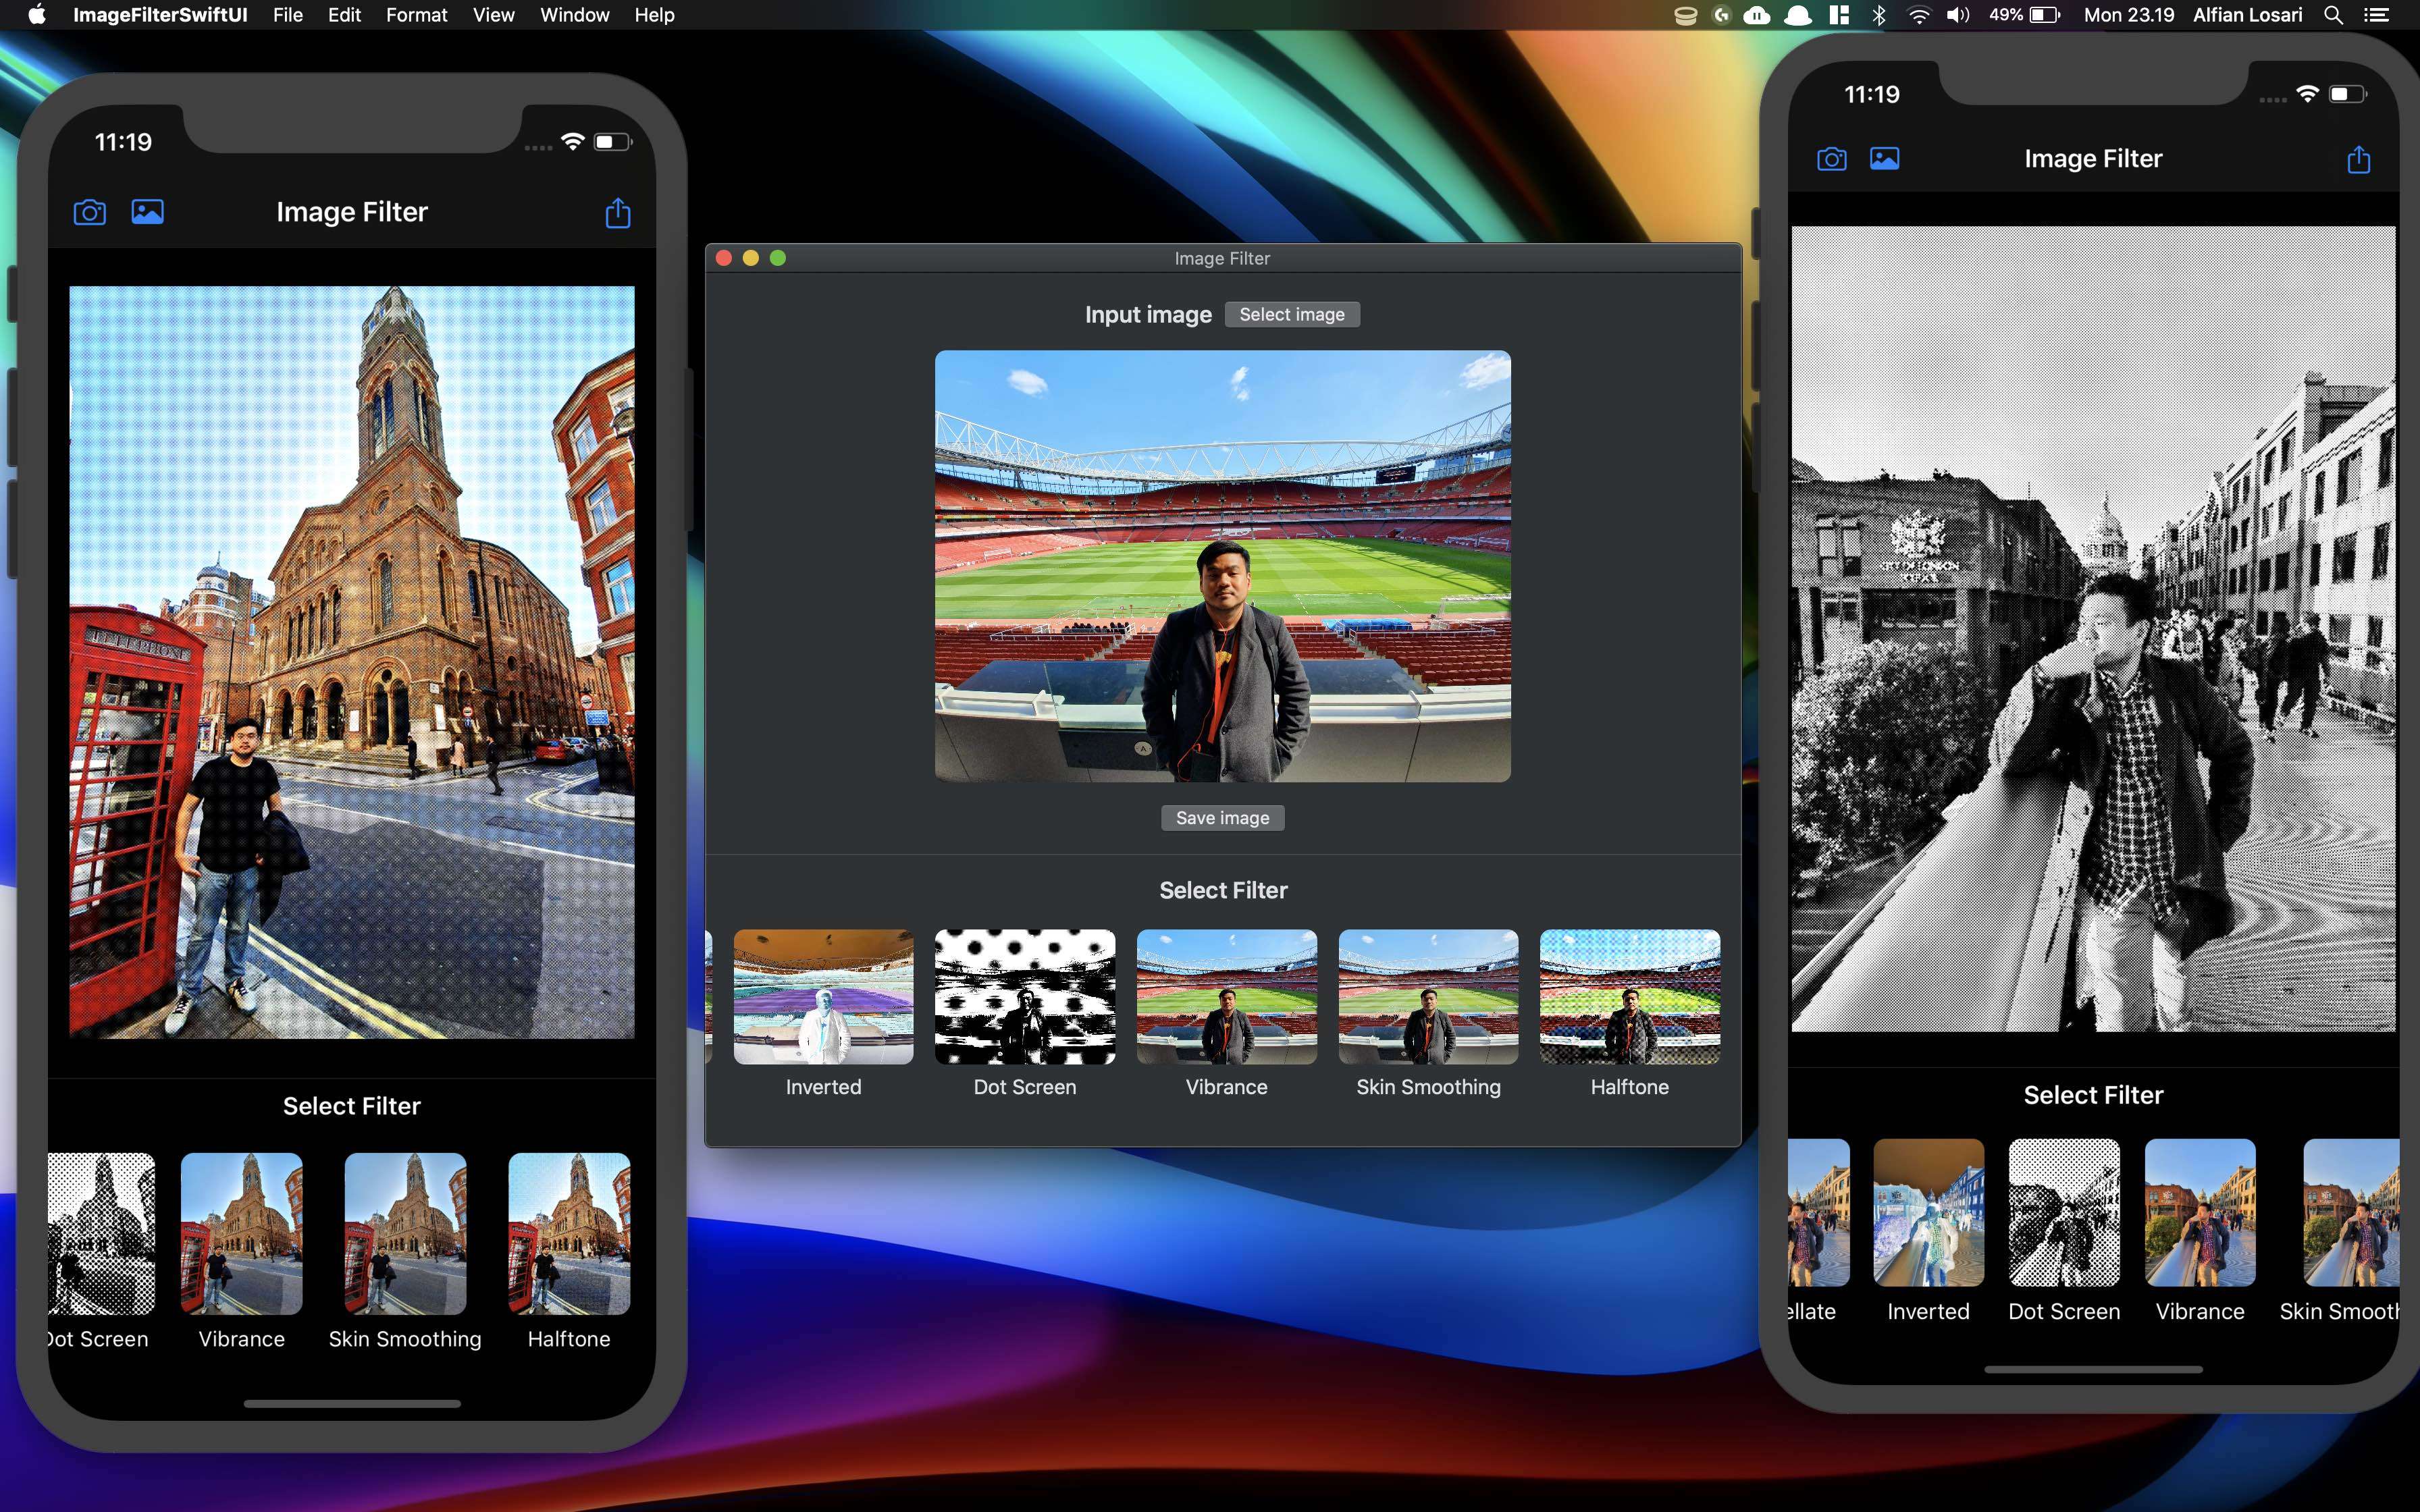
In the previous project, we have successfully built the Image Filter macOS app with SwiftUI. In this tutorial, we are going to expand our target platform to the mobile, iOS. Most of the SwiftUI APIs are cross-compatible between AppKit, WatchKit, UIKit in iOS & tvOS with some of the differences, especially in navigations and controls based Views. SwiftUI provides common views such as control views (Toggle, Picker, TextField, Button) and layout views (ZStack, VStack, HStack). The common views render natively respective to the target platform (Toggle as Checkbox in macOS and as Switcher in iOS).
The main goal of SwiftUI design philosophy is not to Write code once, and run anywhere, but to Learn once, apply anywhere. Apple declared this goal in WWDC 2019 session titled SwiftUI on All Devices. As developers, we don't have to force ourselves to write the UI code only once because each device have their characteristics and strengths. Although, we should aim to share all the models and services code between platform as they are independent of the UI. We can also share some of the Views code if the design is compatible across platforms. You can find all the details by watching the session video from this link WWDC 2019-SwiftUI on All Devices.
What We Will Build
In this tutorial, we are going to add and build iOS target to the current SwiftUI macOS app. Here are the outlines of the tasks to do:
- Add new iOS target to the current project using iOS
Single Apptemplate. - Provide cross-platform image compatibility between
NSImagein AppKit andUIImagein UIKit. - Making the
ImageFiltermodel, observed objects (AppState,ImageFilterObservable) compatible for all the target platforms using target membership. - Handle common views to share between targets such as
CarouselFilterViewandProgressView. - Building iOS specific views.
- Handle image selection using photo library and camera.
- Handle image sharing using
UIActivityViewController.
The Starter Project
To begin the project, you can download the starter project repository from GitHub. The starter project contains several things, such as:
- Completed SwiftUI app for macOS target with models, observed objects, and views.
- Coocoapods dependency for MetalPetal GPU Image Filter Library.
Make sure to run pod install, then open the project xcworkspace, try to build and run the macOS app to play around. You can select the image using a file picker or drag image to the app to filter. A carousel containing built-in filters will be displayed where you can click to apply the filter.
You can also clone or download the completed project from the GitHub repository. Let's begin building our iOS app!
Create new iOS Target
To begin, let's add a new iOS target in the project. From the Menu bar click File > New > Target. From the select template window, select iOS and select Single View App from Application. You can also type in the text field to filter the selection. Give the name ImageFilteriOS as the product name, then click Finish to create the new target.

Close the project from Xcode, using your favorite text editor to open the Podfile and add the new MetalPetal dependency on the new iOS target. After that, run pod install.
target 'ImageFilteriOS' do
  use_frameworks!

  pod 'MetalPetal'
end
Open Xcode project, then change the target to ImageFilteriOS, You can change the target by clicking the target button at the top tab bar beside the stop debug button. Try to build the project to make sure it is successfully built.
Cross-Platform UIImage and NSImage compatibility
Our main app feature is to filter the image. As we know, AppKit uses NSImage while UIKit uses UIImage to deal with an image type. The first problem we want to tackle is how we can make NSImage and UIImage cross-compatible, and be can be used across the targets under the same type. To solve this problem, we can use Swift typealias combined with conditional import and declaration using preprocessor macros. Create a new Swift file named CPImage and copy the following code.
import SwiftUI

#if os(iOS)
    import UIKit
    public typealias CPImage = UIImage
#elseif os(OSX)
    import AppKit
    public typealias CPImage = NSImage
#endif
With the code above, we are going to check the current target OS and import the respective framework for the matching platform, UIKit for iOS, and AppKit for OSX. We also declare typealias named CPImage for both types (CPImage means CrossPlatformImage, as we don't want to use Image because it is already used in SwiftUI).
We also want to create a simple extension to make conversion between CPImage, CIImage, and CGImage simpler between platforms to use in ImageFilter enum.
// CPImage.swift
...

extension CPImage {

    var coreImage: CIImage? {
        #if os(iOS)
        guard let cgImage = self.cgImage else {
            return nil
        }
        return CIImage(cgImage: cgImage)
        #elseif os(OSX)
        guard
            let tiffData = tiffRepresentation,
            let ciImage = CIImage(data: tiffData)
            else {
                return nil
        }
        return ciImage
        #endif
    }
}

extension CGImage {

    var cpImage: CPImage {
        #if os(iOS)
        return UIImage(cgImage: self)
        #elseif os(OSX)
        return NSImage(cgImage: self, size: .init(width: width, height: height))
        #endif
    }
}

extension Image {

    init(cpImage: CPImage) {
        #if os(iOS)
        self.init(uiImage: cpImage)
        #elseif os(OSX)
        self.init(nsImage: cpImage)
        #endif
    }
}
Let's update the ImageFilter enum to use the cross-platform compatible new extension. Update the processFilterWithMetal method inside the ImageFilter.swift file by copying the following code.
// ImageFilter.swift
...
private func processFilterWithMetal(image: NSImage, filterHandler: (MTIImage) -> MTIImage?) -> CPImage {
     guard let ciImage = image.coreImage else {
         return image
     }

     let imageFromCIImage = MTIImage(ciImage: ciImage).unpremultiplyingAlpha()

     guard let outputFilterImage = filterHandler(imageFromCIImage), let device = MTLCreateSystemDefaultDevice(), let context = try? MTIContext(device: device)  else {
         return image
     }
     do {
         let outputCGImage = try context.makeCGImage(from: outputFilterImage)
         let filteredImage = outputCGImage.cpImage

         return filteredImage
     } catch {
         print(error)
         return image
     }
 }
Refactor Current NSImage to use CPImage
Next, we are going to find all the references to NSImage in our code and replace it using CPImage typealias. To help us do the task, we can utilize the Xcode Find and Replace feature, which we can access from the Find Navigator. Make sure to select Matching Case instead of IgnoringCase because SwiftUI Image uses nsImage as the parameter in the initializer, which we don't want to replace.
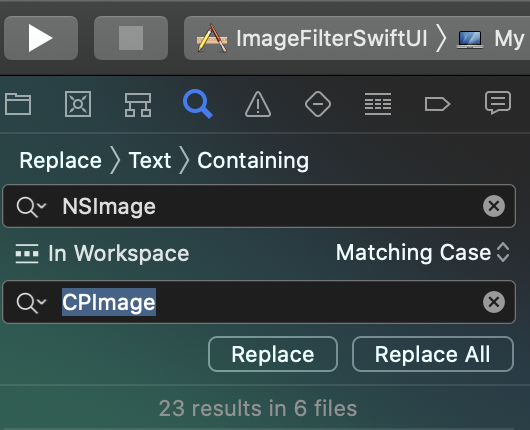
Make sure to run and build the project successfully.
Building Progress View Shared View
Next, we will make the current Progress View compatible with iOS target. Currently, macOS is using AppKit NSProgressIndicator wrapped in NSViewRepresentable, so it can be used in SwiftUI. NSProgressIndicator is not available to use in UIKit environment. Instead, UIKit provides UIActivityIndicatorView to display a circular spinning loading view. We also need to use UIViewRepresentable instead of NSViewRepresentable in UIKit. To implement this, we are going to use preprocessor macro conditional os checking again.
// ProgressView.swift

import SwiftUI

#if os(iOS)
import UIKit
struct ProgressView: UIViewRepresentable {
    func makeUIView(context: UIViewRepresentableContext<ProgressView>) -> UIActivityIndicatorView {
        UIActivityIndicatorView(style: .large)
    }

    func updateUIView(_ uiView: UIActivityIndicatorView, context: UIViewRepresentableContext<ProgressView>) {
        uiView.startAnimating()
    }

}

#elseif os(OSX)
import AppKit
struct ProgressView: NSViewRepresentable {

    func updateNSView(_ nsView: NSProgressIndicator, context: NSViewRepresentableContext<ProgressView>) {
        nsView.style = .spinning
        nsView.startAnimation(self)
    }

    func makeNSView(context: NSViewRepresentableContext<ProgressView>) -> NSProgressIndicator {
        let progressIndicator = NSProgressIndicator()
        return progressIndicator
    }
}
#endif
Add Shared Code Target Membership to iOS Target
In SwiftUI, we want to share models and services so it can be used across all platforms. There are 2 ways to achieve this:
- Add shared target membership to each platform for the source code.
- Create a new platform-independent shared framework and move all the shared source code to the framework. Each target platform needs to import this shared framework.
For the sake of simplicity of this tutorial, we will be using the first approach as we only need to tick the checkbox for the iOS platform in each of the shared source files. You can visit the tutorial on Ray Wenderlich Creating a Framework for iOS to understand more about creating a shared framework.
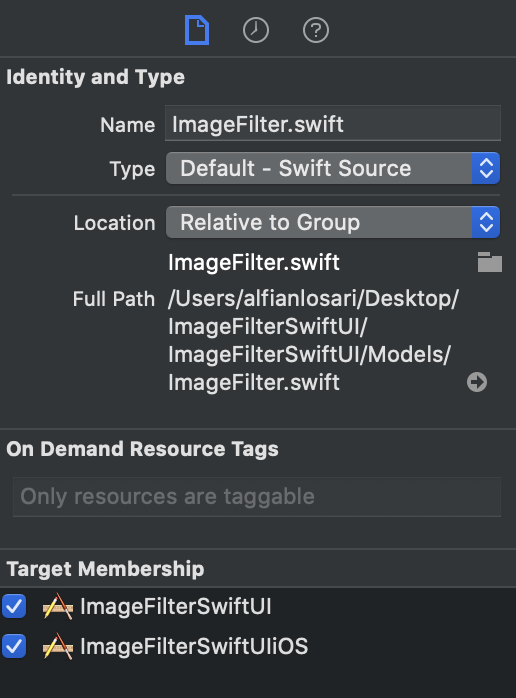
To do this, we need to select the file in the navigator. Then, in the file inspector target membership, make sure to tick the ImageFilteriOS checkbox. This will make sure the source code is available to use in both targets. Here are all the files that we need to add the target membership:
ImageFilter.swiftCPImage.swiftImageFilterView.swiftProgressView.swiftAppState.swiftImageFilterObservable.swift
Make sure to successfully build and run using both macOS and iOS target. Next, we will focus primarily on building the UI for iOS.
Building Image Picker View
Before we begin building our main view, we need to create a view where user can select image both from photo library or camera. SwiftUI doesn't provide this kind of view internally, so to do this, we need to use UIKit UIImagePickerController wrapped in UIViewControllerRepresentable. The ImagePicker has Coordinator class that is acting as UIImagePickerControllerDelegate so it can receive a callback after user selecting or capturing the image. It has 2 instance properties, the image with @Binding and sourceType of image picker. After the user selecting the image from UIImagePickerController, it will assign the value of the image to the binding property so the parent state can update its views using the newly selected image.
Create a new file named ImagePicker and copy the following code.
import SwiftUI

struct ImagePicker: UIViewControllerRepresentable {

    @Environment(\.presentationMode) var presentationMode
    @Binding var image: UIImage?

    var sourceType: UIImagePickerController.SourceType

    func updateUIViewController(_ uiViewController: UIImagePickerController, context: UIViewControllerRepresentableContext<ImagePicker>) {}

    func makeCoordinator() -> Coordinator {
        Coordinator(self)
    }

    class Coordinator: NSObject, UINavigationControllerDelegate, UIImagePickerControllerDelegate {
        var parent: ImagePicker

        init(_ parent: ImagePicker) {
            self.parent = parent
            super.init()
        }

        func imagePickerControllerDidCancel(_ picker: UIImagePickerController) {
            parent.presentationMode.wrappedValue.dismiss()
        }

        func imagePickerController(_ picker: UIImagePickerController, didFinishPickingMediaWithInfo info: [UIImagePickerController.InfoKey : Any]) {
            if let uiImage = info[.originalImage] as? UIImage {
                parent.image = uiImage.fixOrientation
            }
            parent.presentationMode.wrappedValue.dismiss()
        }


    }

    func makeUIViewController(context: UIViewControllerRepresentableContext<ImagePicker>) -> UIImagePickerController {
        let imagePicker = UIImagePickerController()
        imagePicker.sourceType = sourceType
        imagePicker.delegate = context.coordinator
        return imagePicker
    }
}

extension UIImage {

    var fixOrientation: UIImage {
        if (imageOrientation == .up) {
            return self
        }

        UIGraphicsBeginImageContextWithOptions(size, false, scale)
        let rect = CGRect(x: 0, y: 0, width: size.width, height: size.height)
        draw(in: rect)

        let normalizedImage = UIGraphicsGetImageFromCurrentImageContext()!
        UIGraphicsEndImageContext()

        return normalizedImage
    }
}

extension UIImagePickerController.SourceType: Identifiable {
    public var id: Int { rawValue }
}
Inside, we also provide an additional extension for UIImage to fix the image orientation because sometimes, when capturing an image using the camera, the orientation can be messed up. Additionally, we also make the UIImagePickerController.SourceType conform to Identifiable by providing the unique rawValue.
Finally, we need to add additional privacy photo library and camera usage description in the info.plist file inside the ImageFilteriOS target. Add 2 following permissions:
- Privacy - Photo Library Usage Description.
- Privacy - Camera Usage Description.
Building the Content View
The root view for our app is Navigation View. Inside, we embed a VStack for the input image and horizontal carousel containing the image filters. We also use the Navigation Bar Leading and Trailing items for the select photo library, capture from the camera, and sharing buttons.
We will have 2 instance properties inside the Content View:
appState @EnvironmentObjectprovidingpublishedstate properties for the selected input image and selected filtered image. We will pass the input image property as a binding to theImagePicker.imagePickerSourceType @Stateas a binding to determine whether theImagePickersheet should be presented. The initial value isnil,and when the user taps on the photo library or camera button, the value will be set, triggering the presentation of the sheet containingImagePicker.
Open ContentView.swift and copy the following code.
import SwiftUI

struct ContentView: View {

    @EnvironmentObject var appState: AppState
    @State var imagePickerSourceType: UIImagePickerController.SourceType?

    var body: some View {
        NavigationView {
            VStack {
                Spacer()
                ZStack {
                    if appState.image != nil {
                        Image(cpImage: appState.filteredImage != nil ? appState.filteredImage! : appState.image!)
                            .resizable()
                            .aspectRatio(contentMode: .fit)
                    } else {
                        Text("Add Picture from Photo Library or Camera")
                            .font(.headline)
                            .padding()
                    }
                }
                .padding(.vertical)

                Spacer()
                Divider()

                CarouselFilterView(image: appState.image, filteredImage: self.$appState.filteredImage)
                    .equatable()
            }
            .navigationBarItems(leading:
                HStack(spacing: 16) {
                    if UIImagePickerController.isSourceTypeAvailable(.camera) {
                        Button(action: {
                            self.imagePickerSourceType = .camera
                        }) {
                            Image(systemName: "camera")
                        }
                    }
                    Button(action: {
                        self.imagePickerSourceType = .photoLibrary
                    }) {
                        Image(systemName: "photo")
                    }
                }
                , trailing:
                Button(action: self.shareImage) {
                    Image(systemName: "square.and.arrow.up")
                }
            )
                .navigationBarTitle("Image Filter", displayMode: .inline)
                .sheet(item: self.$imagePickerSourceType) {
                    ImagePicker(image: self.$appState.image, sourceType: $0)
            }
        }
    }

    private func shareImage() {
        // TODO: Add share using UIActivityViewController
    }
}
Try to build and run the project using your iOS device, and you should be able to select an image from both the camera and photo library from the image picker. Play around with applying filters from the built-in carousel!
Handle Sharing Image
To share the filtered image, we will use UIActivityViewController. In this case, we can just instantiate and pass the filtered image to share. To present this view controller, we retrieve the application window root view controller and present the view controller with the modal presentation.
Copy and paste the following code into the Content View shareImage method.
// ContentView.swift
...
private func shareImage() {
    guard let image = self.appState.filteredImage ?? self.appState.image else {
        return
    }
    let imageToShare = [image]
    let activityViewController = UIActivityViewController(activityItems: imageToShare, applicationActivities: nil)
    UIApplication.shared.windows.first?.rootViewController?.present(activityViewController, animated: true, completion: nil)
}
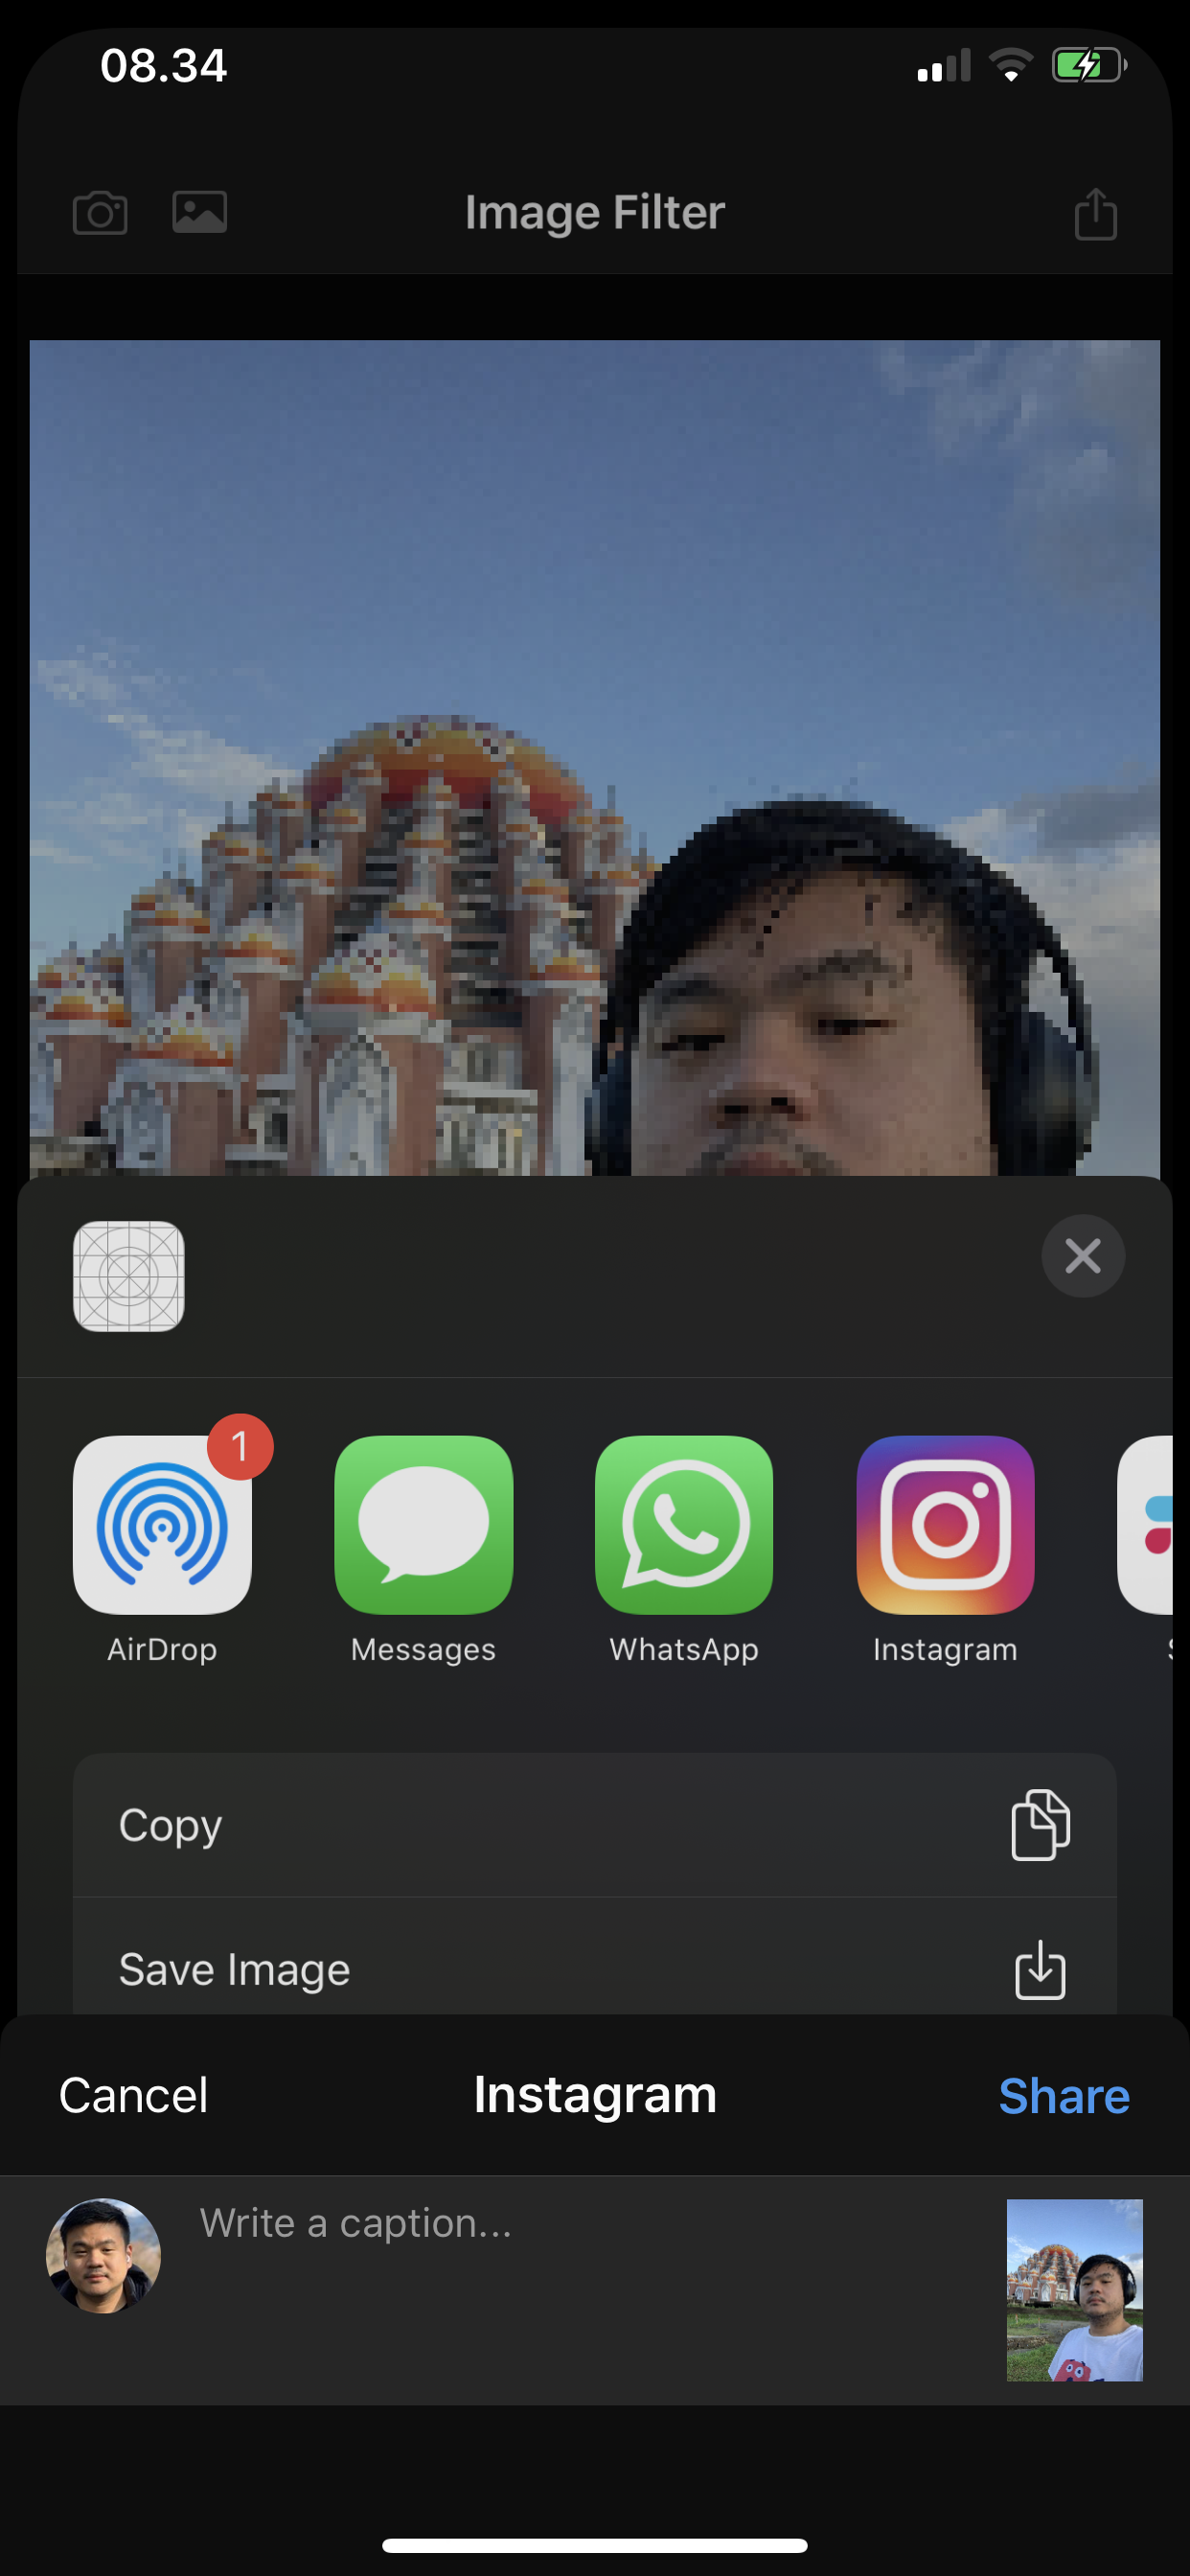
Build and run the app to try the sharing feature. We can share with our installed social media apps such as Instagram, WhatsApp, etc. Also, we can save to the photo library and share it locally with Airdrop.
Conclusion
Congrats on finishing the iOS app! With SwiftUI, we can learn and build our skillset that can be applied for building user interface on any devices ranging from wearable, smartphone, tablet, laptop to living room entertainment device. Remember that the main goal is not to write UI code once to run anywhere instead to learn and apply the same skill anywhere. As designers and front end developers, we need to provide the best user experience for each platform. Until the next one, let’s keep the lifelong learning goes on!