Building Responsive and Adaptive iOS App with UICollectionView
Published at Mar 14, 2019
UICollectionView is an UIKit view that manages collection of ordered items and presents the items using customizable layout. It was introduced by Apple in WWDC 2012 with the release of iOS 6 SDK. UICollectionView interface is quite similar with the old UITableView as it provides DataSource as a source to display the data and Delegate to handle interaction for each item.
Unlike UITableView that display each row using a fixed list layout inside UITableViewCell, UICollectionView provides flexibility and customizability for developers to provide their own layout by subclassing UICollectionViewLayout, it also supports custom decoration view, customizable size for each individual section view and cells. Apple itself provides us one layout out of the box to use called UICollectionViewFlowLayout.
UICollectionViewFlowLayout is the layout that displays items using grid system, with supports of headers and footers. It also provides 2 scroll directions, vertical and horizontal.
In vertical direction, the width of the item is constrained with the width of the collection view, so in each row it will try to fill as many item as possible inside the bounds of collection view width before it falls down to the next row so user can scroll the content vertically.
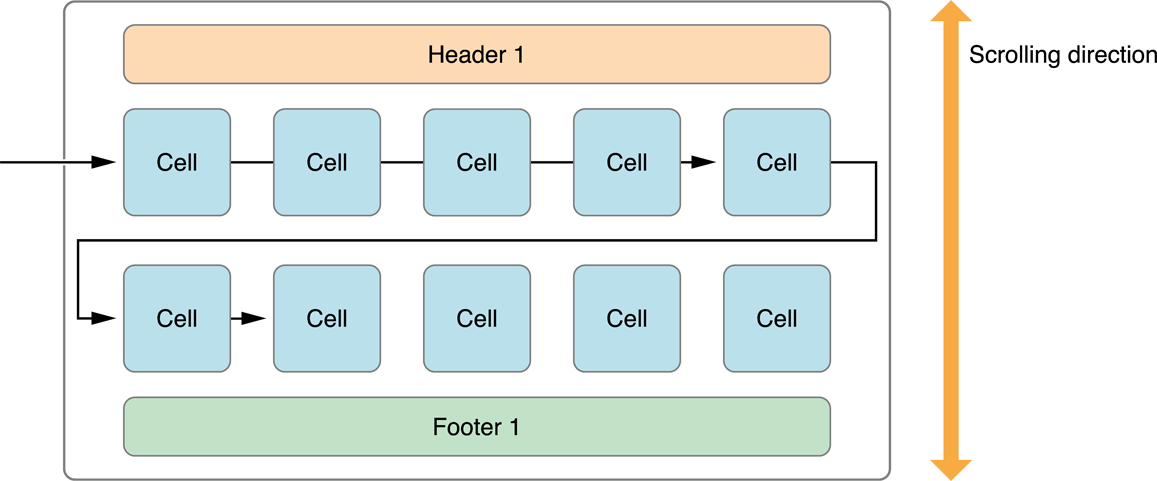
While on the horizontal direction, the height of the content is constrained with the height of the collection view, so in each column it will as many item as possible before it moves right to next column so user can scroll horizontally. Horizontal scroll direction is very suitable if you want to build a carousel using collection view.
What We Will Build
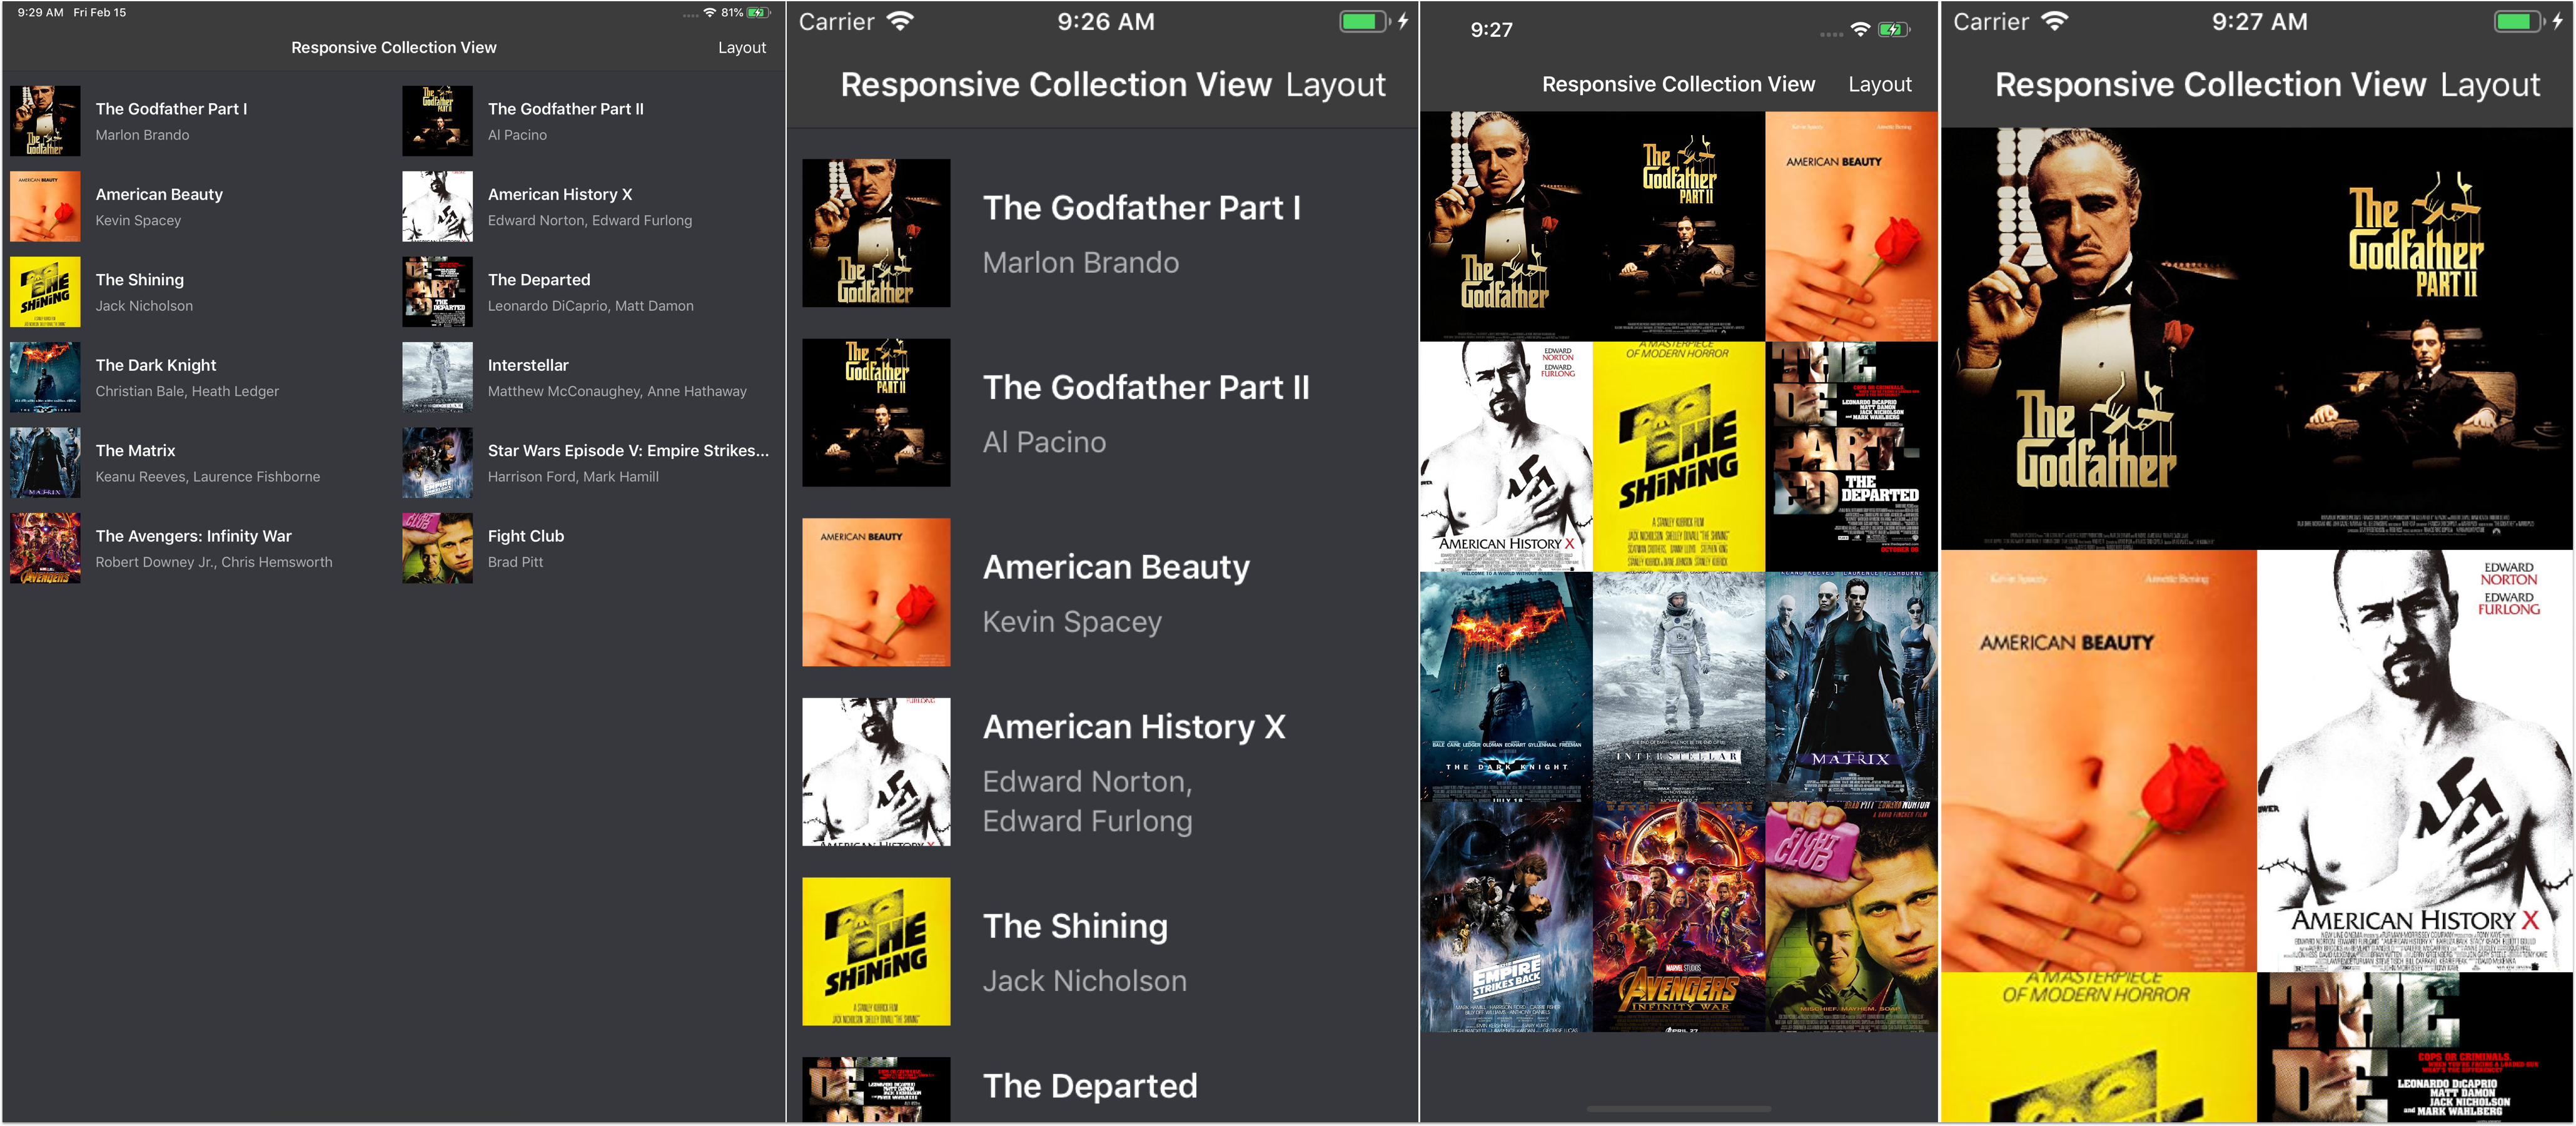
In this article we are going to build a responsive movie list app that is adaptive to various form factors from the small iPhone 5 up to largest iPad Pro using UICollectionViewFlowLayout. Users will have the options to display the movies using list, small grid, and large grid layout. Here are the tasks that we will be doing:
- Starting the project.
- Building the Model.
- Building the MainListViewController.
- Building the List Layout.
- Building the Grid Layout.
Starting the project
To begin the project, you can download the starter project in the GitHub repository at alfianlosari/responsive-ios-collection-view-starter.
The starter project contains several assets, collection view cells for list and grid item layout that we will use for the Collection View.
Building the Model
Let’s create our model to represent the Movie. Create a new File and name it Movie.swift. Copy the declaration below to create the Movie struct with all the properties.
import UIKit

struct Movie {
    let title: String
    let description: String
    let posterImage: UIImage?
}

extension Movie {

    static let dummyMovies: [Movie] = [
        Movie(title: "The Godfather Part I", description: "Marlon Brando", posterImage: UIImage(named: "godfather")),
        Movie(title: "The Godfather Part II", description: "Al Pacino", posterImage: UIImage(named: "godfather2")),
        Movie(title: "American Beauty", description: "Kevin Spacey", posterImage: UIImage(named: "americanbeauty")),
        Movie(title: "American History X", description: "Edward Norton, Edward Furlong", posterImage: UIImage(named: "historyx")),
        Movie(title: "The Shining", description: "Jack Nicholson", posterImage: UIImage(named: "shining")),
        Movie(title: "The Departed", description: "Leonardo DiCaprio, Matt Damon", posterImage: UIImage(named: "departed")),
        Movie(title: "The Dark Knight", description: "Christian Bale, Heath Ledger", posterImage: UIImage(named: "darkknight")),
        Movie(title: "Interstellar", description: "Matthew McConaughey, Anne Hathaway", posterImage: UIImage(named: "interstellar")),
        Movie(title: "The Matrix", description: "Keanu Reeves, Laurence Fishborne", posterImage: UIImage(named: "matrix")),
        Movie(title: "Star Wars Episode V: Empire Strikes Back", description: "Harrison Ford, Mark Hamill", posterImage: UIImage(named: "starwarsv")),
        Movie(title: "The Avengers: Infinity War", description: "Robert Downey Jr., Chris Hemsworth", posterImage: UIImage(named: "avengers")),
        Movie(title: "Fight Club", description: "Brad Pitt", posterImage: UIImage(named: "fightclub"))
    ]
}
We will also create another model to represent to Layout using enum. The LayoutOption enum will have 3 unique cases that represent the list, small grid, and large grid.
import Foundation

enum LayoutOption {

    case list
    case smallGrid
    case largeGrid

}
Building the MainListViewController
Let’s create our only View Controller for the app. Open the main.storyboard file, drag the Collection View Controller from the Object Library to the scene editor. Then embed it into a Navigation Controller. Select the Collection View, then set the background color to #292A2F in the attributes inspector.
Next, create a new File and name it MainListViewController.swift. It is a subclass of UICollection ViewController. Here are the things that we will setup initially:
- Instance properties to store the model and the layout option. Here we will use stub movies array to drive the Collection View Data Source and list layout as the initial layout option.
- setupCollectionView(). Register the list and grid cells from the Nibs.
- setupNavigationBarItem(). Setup bar button item with target action selector that trigger the alert controller action sheet presentation for the user to select the layout option.
- setupLayout(with:). Adjust the Collection View FlowLayout item size, spacing, section insets in relationship with the container size passed, layout option selected, and current trait classes.
- Implement the collectionView(collectionView: numberOfItemsInSection:). This will return the number of items in movies array.
- Implement the collectionView(collectionView:,cellForItemAt:). This method will use switch statement for the layoutOption property then based on the case will dequeue the list and grid cell respectively. The movie property will also be passed into the cell to be displayed based on the attributes.
import UIKit

private let listReuseIdentifier = "ListCell"
private let gridReuseIdentifier = "GridCell"

class MainListCollectionViewController: UICollectionViewController {

    private let movies = Movie.dummyMovies
    private var layoutOption: LayoutOption = .list {
        didSet {
            setupLayout(with: view.bounds.size)
        }
    }

    override func viewDidLoad() {
        super.viewDidLoad()
        setupCollectionView()
        setupNavigationBarItem()
        setupLayout(with: view.bounds.size)
    }

    private func setupCollectionView() {
        collectionView.register(UINib(nibName: "MovieLayoutListCollectionViewCell", bundle: nil), forCellWithReuseIdentifier: listReuseIdentifier)
        collectionView.register(UINib(nibName: "MovieLayoutGridCollectionViewCell", bundle: nil), forCellWithReuseIdentifier: gridReuseIdentifier)
    }

    private func setupLayout(with containerSize: CGSize) {
        guard let flowLayout = collectionView.collectionViewLayout as? UICollectionViewFlowLayout else {
            return
        }

        switch layoutOption {
        case .list:
            break

        case .largeGrid, .smallGrid:
            break
        }

        collectionView.reloadData()
    }

    private func setupNavigationBarItem() {
        let barButtonItem = UIBarButtonItem(title: "Layout", style: .plain, target: self, action: #selector(layoutTapped(_:)))
        navigationItem.rightBarButtonItem = barButtonItem
    }

    @objc private func layoutTapped(_ sender: Any) {
        let alertController = UIAlertController(title: "Select Layout", message: nil, preferredStyle: .actionSheet)
        alertController.popoverPresentationController?.barButtonItem = navigationItem.rightBarButtonItem
        alertController.addAction(UIAlertAction(title: "List", style: .default, handler: { (_) in
            self.layoutOption = .list
        }))

        alertController.addAction(UIAlertAction(title: "Large Grid", style: .default, handler: { (_) in
            self.layoutOption = .largeGrid
        }))

        alertController.addAction(UIAlertAction(title: "Small Grid", style: .default, handler: { (_) in
            self.layoutOption = .smallGrid
        }))

        alertController.addAction(UIAlertAction(title: "Cancel", style: .cancel, handler: nil))
        present(alertController, animated: true, completion: nil)
    }
}

extension MainListCollectionViewController {

    override func collectionView(_ collectionView: UICollectionView, numberOfItemsInSection section: Int) -> Int {
        return movies.count
    }

    override func collectionView(_ collectionView: UICollectionView, cellForItemAt indexPath: IndexPath) -> UICollectionViewCell {
        switch layoutOption {
        case .list:
            let cell = collectionView.dequeueReusableCell(withReuseIdentifier: listReuseIdentifier, for: indexPath) as! MovieLayoutListCollectionViewCell
            let movie = movies[indexPath.item]
            cell.setup(with: movie)
            return cell

        case .largeGrid:
            let cell = collectionView.dequeueReusableCell(withReuseIdentifier: gridReuseIdentifier, for: indexPath) as! MovieLayoutGridCollectionViewCell
            let movie = movies[indexPath.item]
            cell.setup(with: movie)
            return cell

        case .smallGrid:
            let cell = collectionView.dequeueReusableCell(withReuseIdentifier: gridReuseIdentifier, for: indexPath) as! MovieLayoutGridCollectionViewCell
            let movie = movies[indexPath.item]
            cell.setup(with: movie)
            return cell
        }
    }
}
Building the List Layout
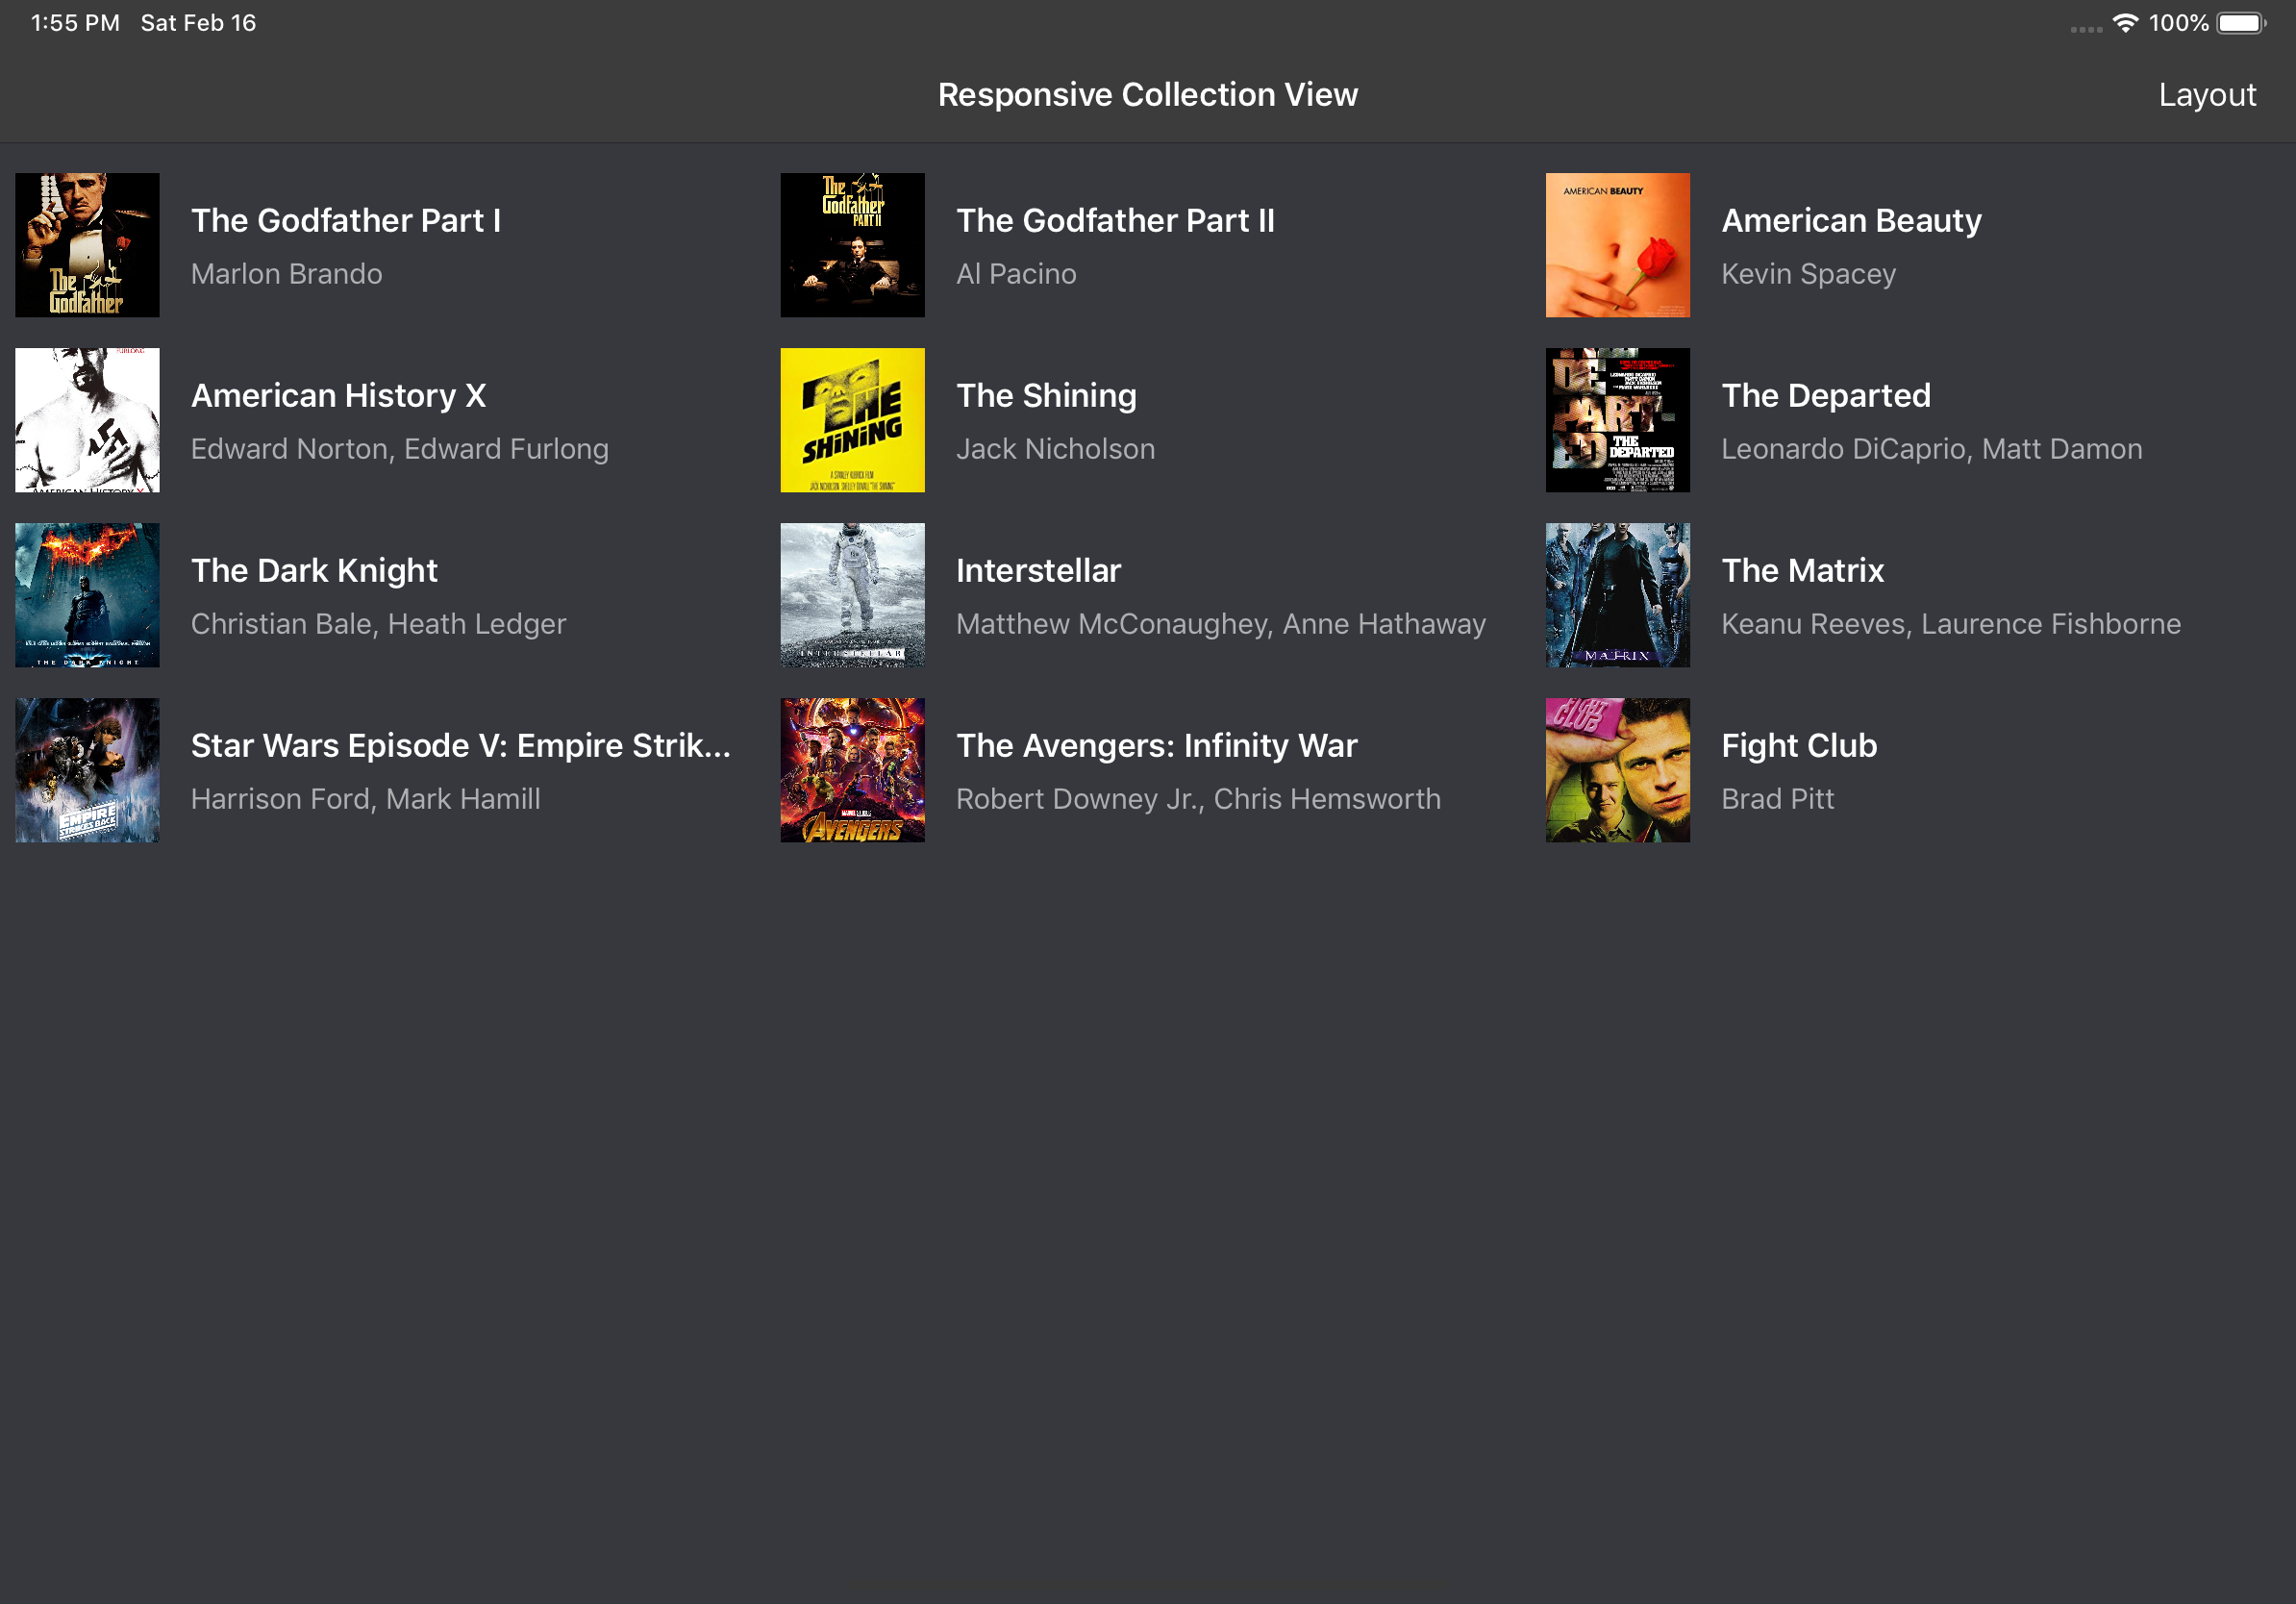
Let’s build the list layout, in this layout, the cell items will render like UITableViewCell with subtitle style plus an UIImageView. Take a peek in MovieLayoutListCollectionViewCell provided by the starter project to see the layout.
In the MainListViewController setupLayout(with:), we will get the collection view flow layout instance and perform switch statement on the layout option. In list layout, when the horizontal trait class is compact, each cell will take the full width of the collection view, other than that it will use 300 minimum item width, then calculate the maximum number of item inside the row, and readjust the size if there is any fraction remainder when calculating the items in the row. The height for the item will be fixed at 91.
In situation where the horizontal trait class is not compact, such as using iPhone Plus, XS Max in landscape, any iPad the item will be divided into at least 2 columns, the columns will increase when the width of the device increases. We also set the section insets for top and bottom with the value of 8 to add some spacing.
Because our app supports multiple orientation, we need to make also trigger the layout update with the new size when the device is rotated or the device trait classes has been updated. There are 2 methods that we should override:
- viewWillTransition(to:coordinator:). This will be invoked whenever the orientation changes.
- traitCollectionDidChange(previousTraitCollection:). This will be invoked whenever the trait classes gets updated.
// MovieListViewController
private func setupLayout(with containerSize: CGSize) {
    guard let flowLayout = collectionView.collectionViewLayout as? UICollectionViewFlowLayout else {
        return
    }

    switch layoutOption {
    case .list:
        flowLayout.minimumInteritemSpacing = 0
        flowLayout.minimumLineSpacing = 0
        flowLayout.sectionInset = UIEdgeInsets(top: 8.0, left: 0, bottom: 8.0, right: 0)

        if traitCollection.horizontalSizeClass == .regular {
            let minItemWidth: CGFloat = 300
            let numberOfCell = containerSize.width / minItemWidth
            let width = floor((numberOfCell / floor(numberOfCell)) * minItemWidth)
            flowLayout.itemSize = CGSize(width: width, height: 91)
        } else {
            flowLayout.itemSize = CGSize(width: containerSize.width, height: 91)
        }

    case .largeGrid, .smallGrid:
        break
    }

    collectionView.reloadData()
}

override func viewWillTransition(to size: CGSize, with coordinator: UIViewControllerTransitionCoordinator) {
    super.viewWillTransition(to: size, with: coordinator)
    setupLayout(with: size)
}

override func traitCollectionDidChange(_ previousTraitCollection: UITraitCollection?) {
    super.traitCollectionDidChange(previousTraitCollection)
    setupLayout(with: view.bounds.size)
}
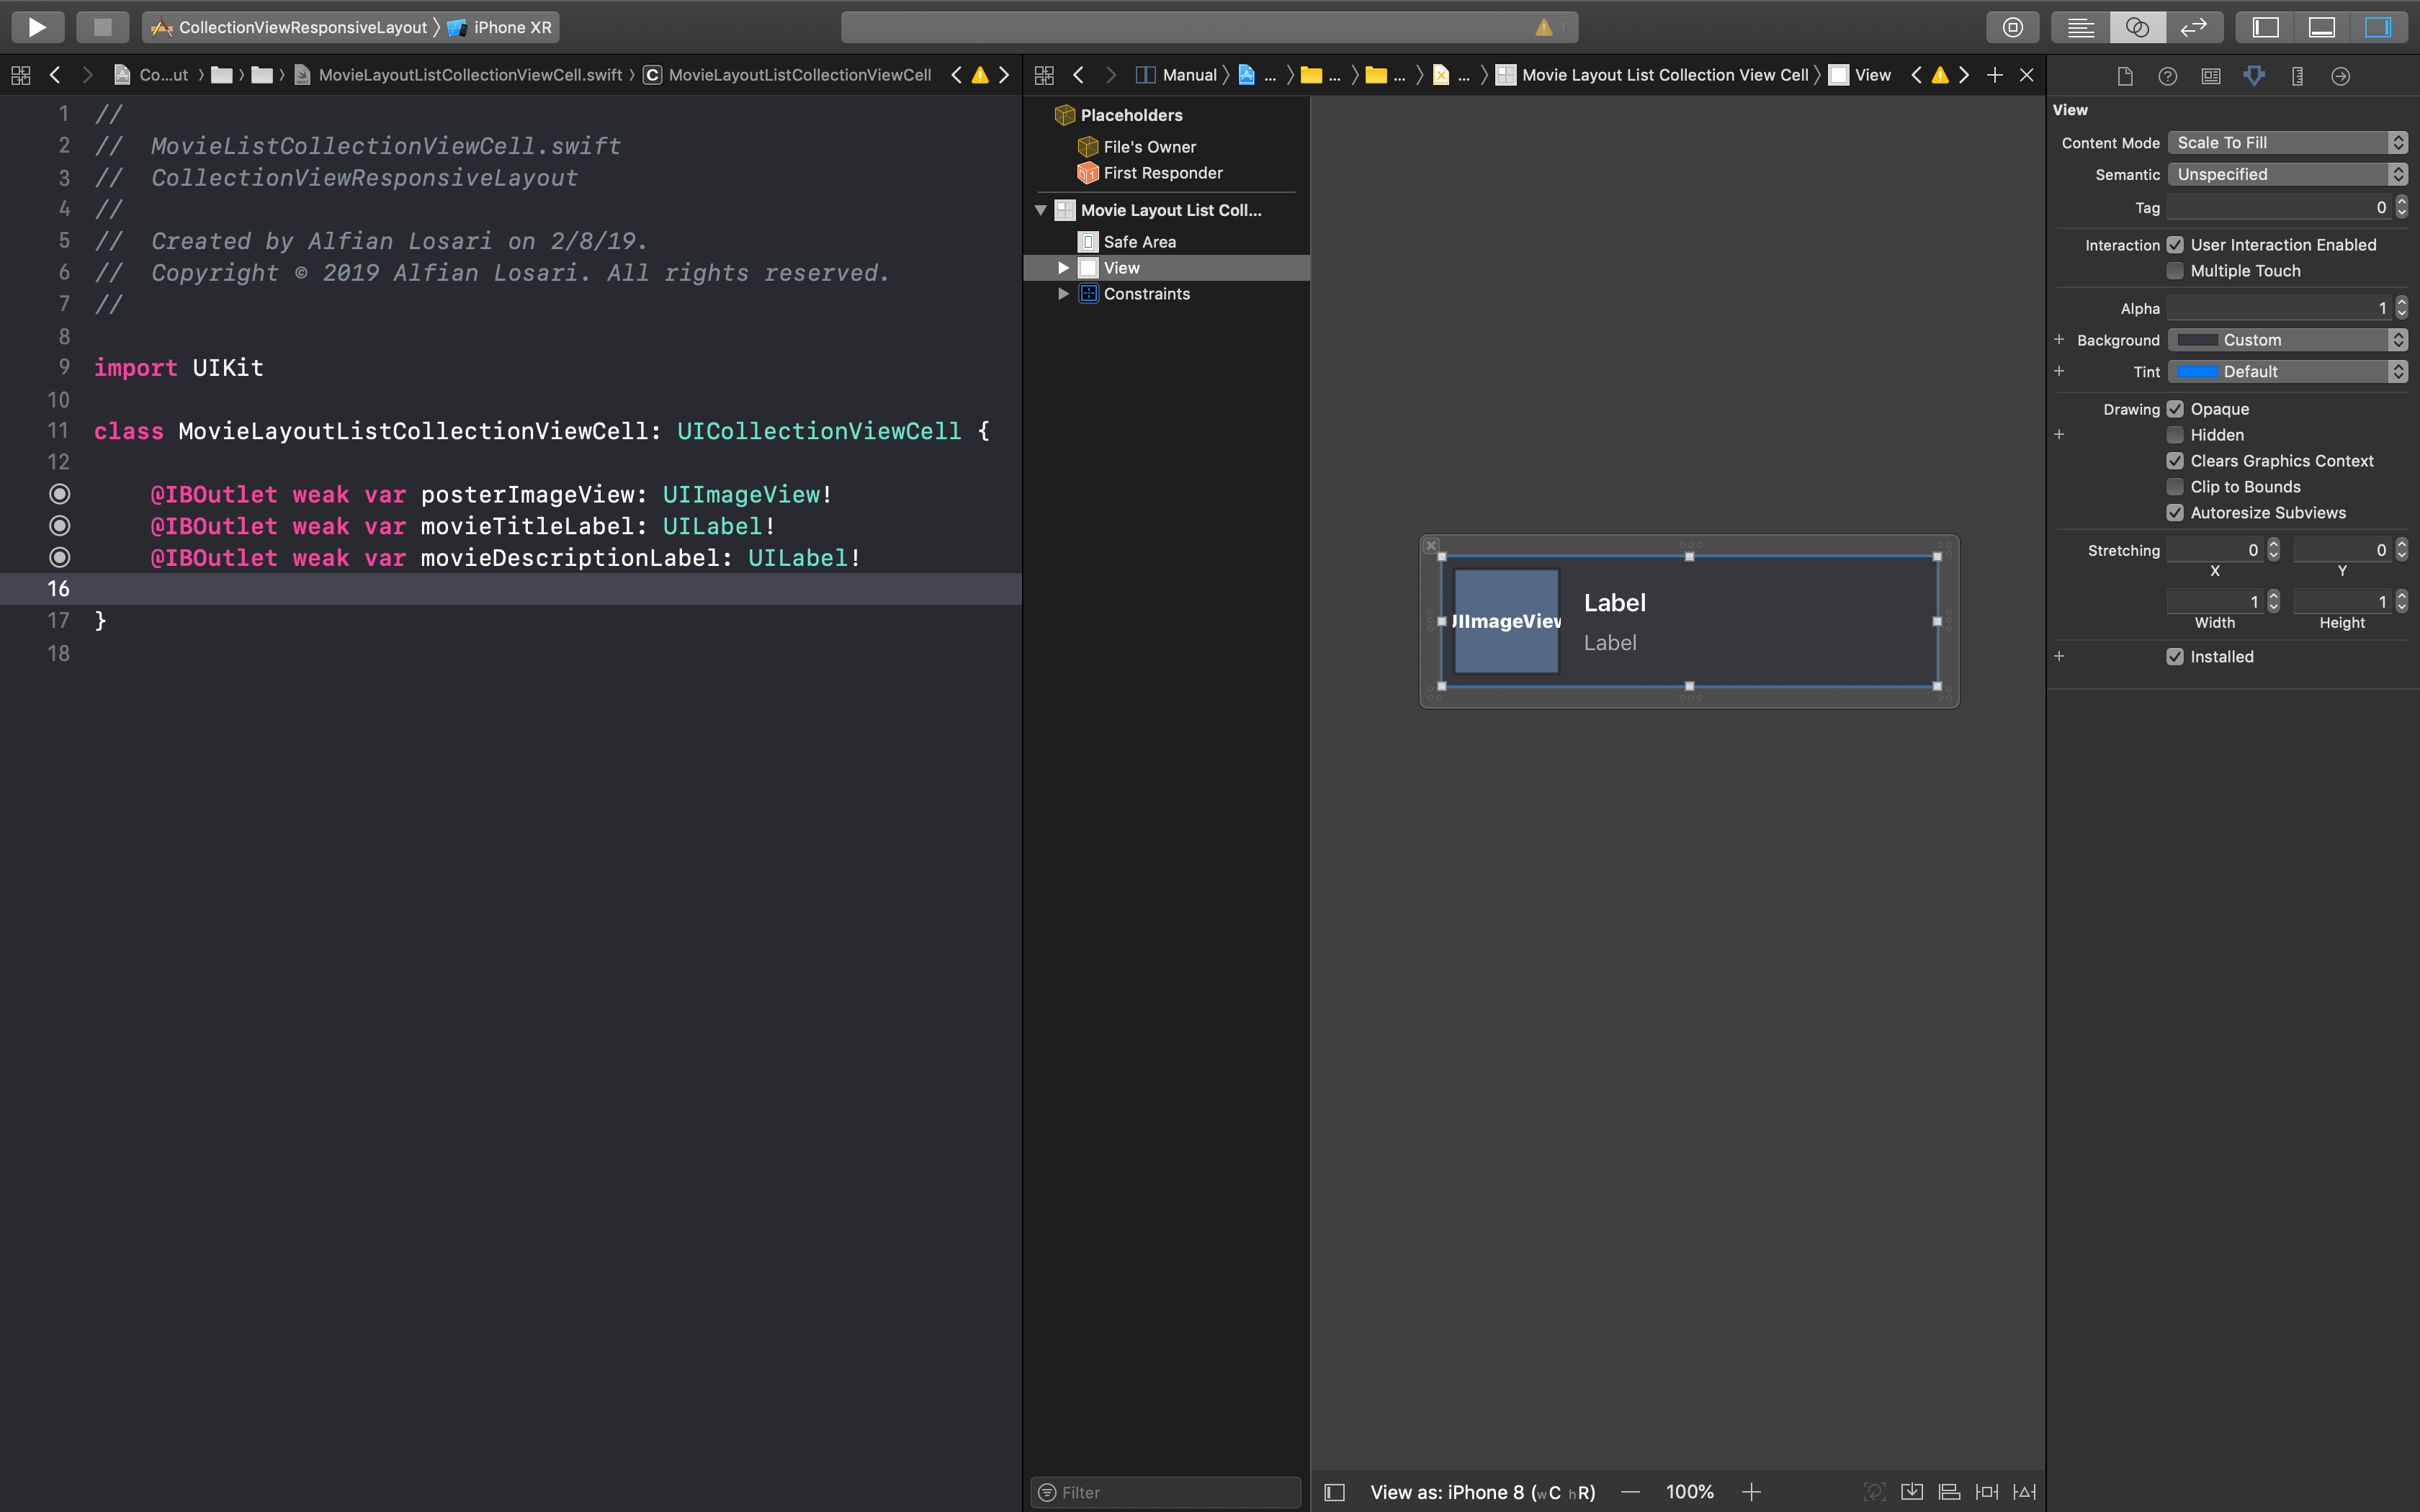
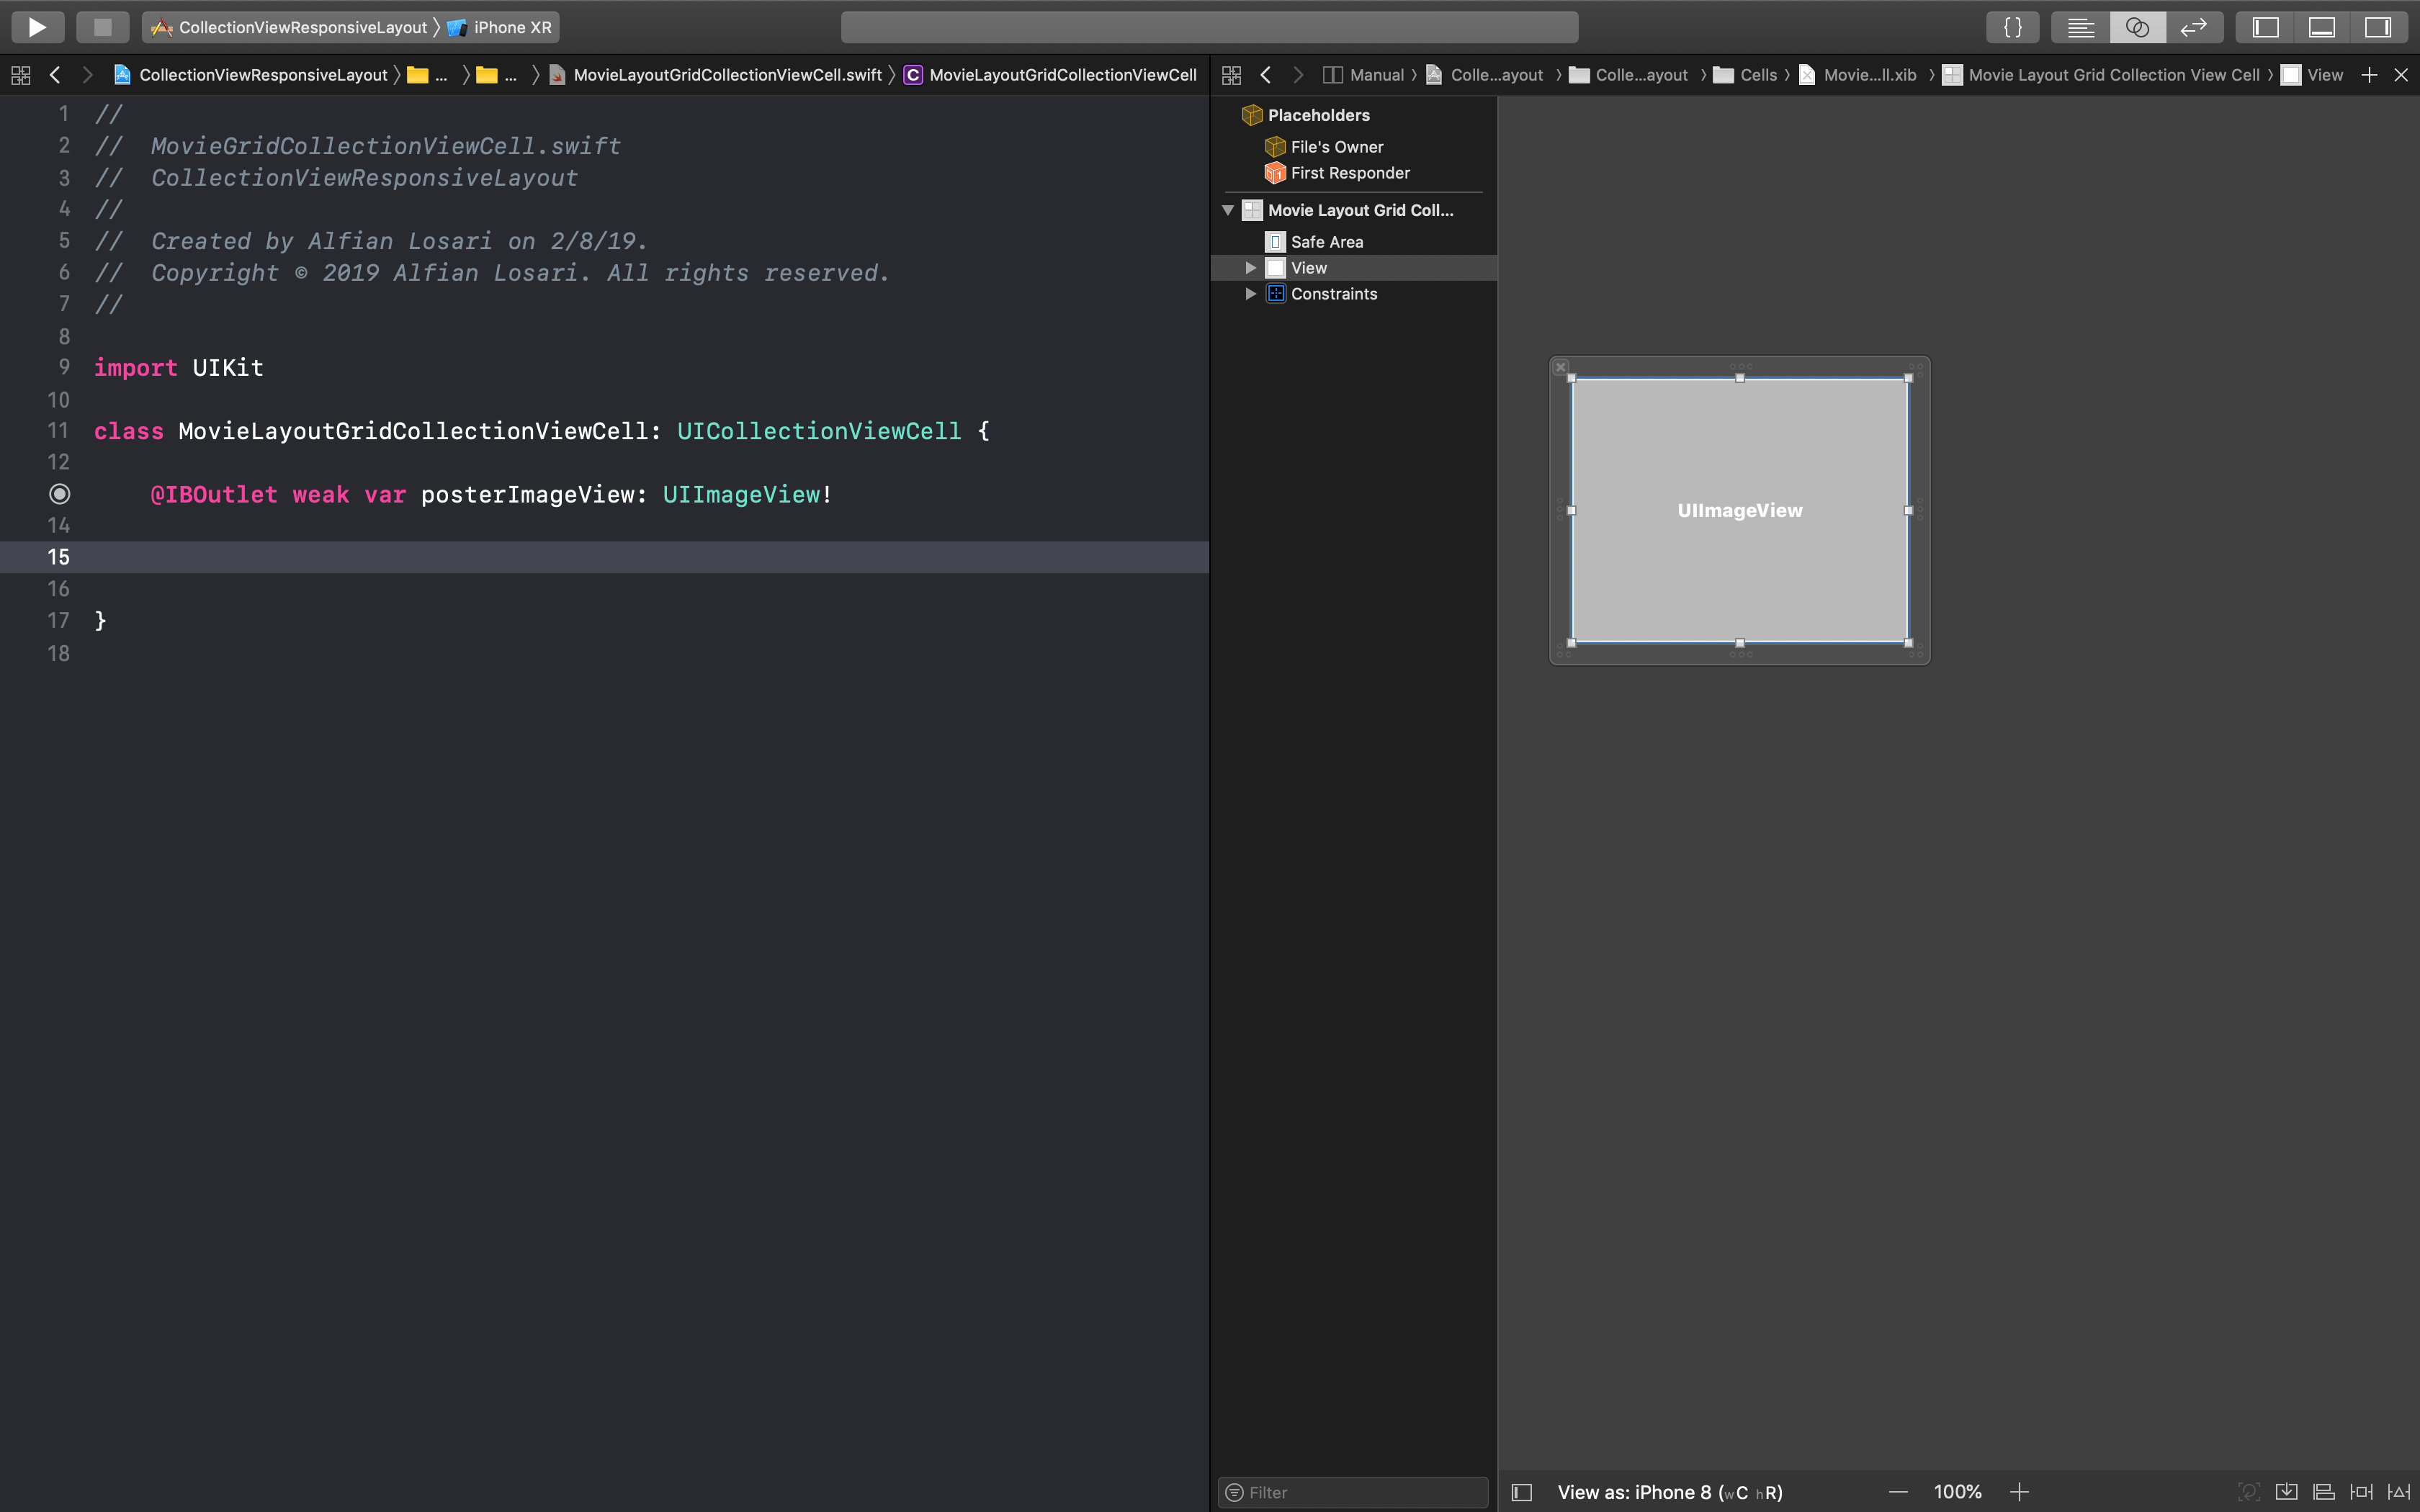
We also need to make sure to update the MovieLayoutListCollectionViewCell, in here we create a method setup(movie:) so we can setup the label and image view when the movie is passed.
import UIKit

class MovieLayoutListCollectionViewCell: UICollectionViewCell {

    @IBOutlet weak var posterImageView: UIImageView!
    @IBOutlet weak var movieTitleLabel: UILabel!
    @IBOutlet weak var movieDescriptionLabel: UILabel!

    func setup(with movie: Movie) {
        posterImageView.image = movie.posterImage
        movieTitleLabel.text = movie.title
        movieDescriptionLabel.text = movie.description
    }

}
Build and run the project to see our list layout in action, try to run using devices like iPhone XS Max and iPad Pro in various orientation to see the list columns.
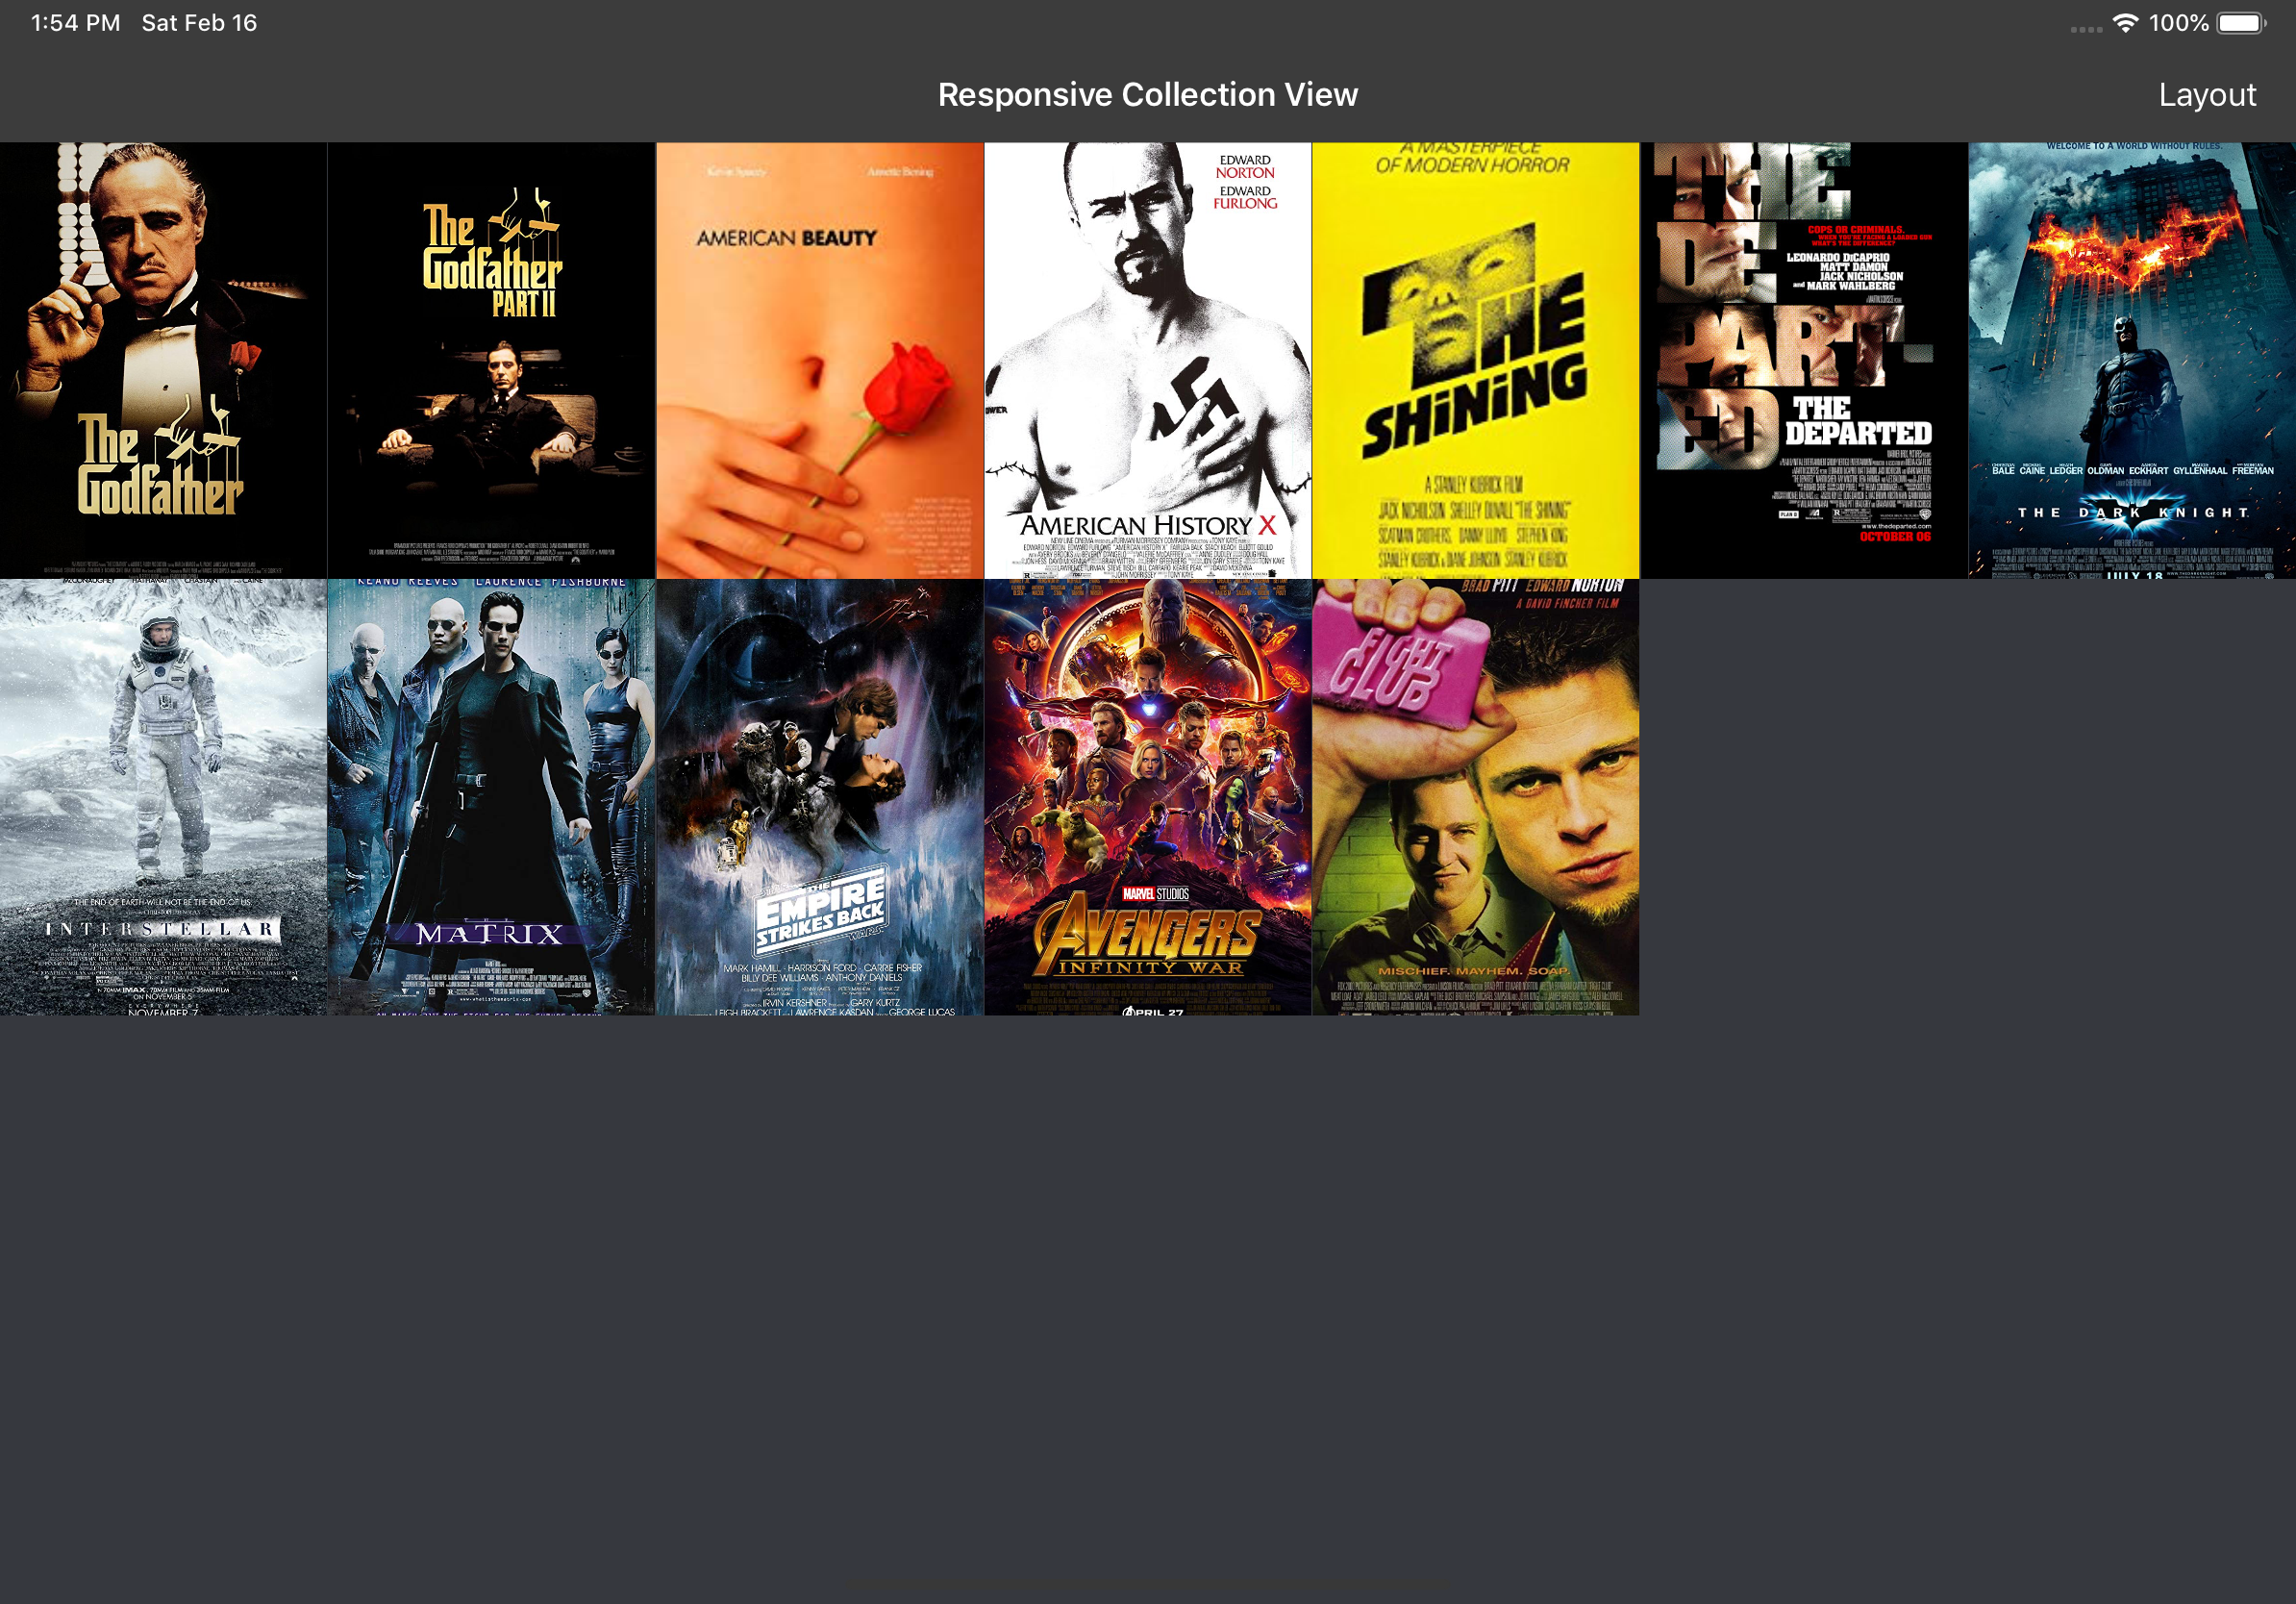
Building the Grid Layout
Let’s build the grid layout, in this layout each cell will display only the poster image of the movie inside each cell. Take a peek in MovieLayoutGridCollectionViewCell provided by the starter project to see the layout.
We will add additional case for small grid and large grid cases inside the MainListViewController setupLayout(with:). In here, we will declare the minimum item size width for small grid to be 106 and for the large grid to be 160. Then, using the same technique as the list layout, we will calculate the maximum number of item in row by dividing the collection view width with the minimum width, then use the remainder fraction to find the adjusted width to fit the row. The movie poster will have the aspect ratio of 3:4, so based on this we will calculate the height of the cell using the adjusted width we calculate before.
private func setupLayout(with containerSize: CGSize) {
    guard let flowLayout = collectionView.collectionViewLayout as? UICollectionViewFlowLayout else {
        return
    }

    switch layoutOption {
    case .list:
        // ....
    case .largeGrid, .smallGrid:
        let minItemWidth: CGFloat
        if layoutOption == .smallGrid {
            minItemWidth = 106
        } else {
            minItemWidth = 160
        }

        let numberOfCell = containerSize.width / minItemWidth
        let width = floor((numberOfCell / floor(numberOfCell)) * minItemWidth)
        let height = ceil(width * (4.0 / 3.0))

        flowLayout.minimumInteritemSpacing = 0
        flowLayout.minimumLineSpacing = 0
        flowLayout.itemSize = CGSize(width: width, height: height)
        flowLayout.sectionInset = .zero
    }

    collectionView.reloadData()
}
Make sure to update the MovieLayoutGridCollectionViewCell, in here we create a method setup(movie:) so we can setup the image view when the movie is passed.
import UIKit

class MovieLayoutGridCollectionViewCell: UICollectionViewCell {

    @IBOutlet weak var posterImageView: UIImageView!

    func setup(with movie: Movie) {
        posterImageView.image = movie.posterImage

    }

}
Build and run the project, then tap on the bar button item to change the layout to small or large grid to see our grid layout option in action.
Conclusion
Finally, we have successfully build responsive and adaptive iOS app using Collection View, congratulations!!. Building an adaptive and responsive iOS app is not that hard with the help of Cocoa Touch Trait Classes combined with UIKIt classes like UICollectionView and UIStackView. It also provides us advantage so we can utilize just one single codebase for iPhone & iPad for better maintainability. Keep up on lifelong learning and Happy Swifting 😋.
You can clone the completed project source code GitHub Repository at alfianlosari/ResponsiveCollectionView.