Building SwiftUI Video Game DB App using IGDB Remote API
Published at Aug 9, 2019

SwiftUI is a new UI framework introduced by Apple at WWDC 2019 which can be used to build user interface for all Apple platforms from watchOS, tvOS, iOS, and macOS using single unified API and tools. It is using declarative syntax to describe the user interface. The smallest component, View is a protocol to conform for building custom view so it can be reused and composed together to build layout. It has many built in View from List, Stacks, NavigationView, TabView, Form, TextField, and many more that can be used out of the box to create app.
One of the coolest feature for developers even UX designers is the new built in Xcode Live design tools that can be used to build live UI as we type the code, the compiler instantly recompiles the application to reflect the change in the UI. It also supports drag and drop of the View component to build your user interface. Preview is also configurable, from fonts, localization, and Dark Mode. Right now, this feature is only supported when you run Xcode 11 on macOS 10.15 Catalina.
What we will learn to build
In this article, we will be building a real life practical SwiftUI app using IGDB API with the following main features:
- Fetch latest games from IGDB API so it can be displayed into a scrollable list.
- Display the title, information, and image thumbnail of each game in each row of the list
- Navigate to game detail containing the detailed information and screenshoots of the game.
We will learn about how SwiftUI handles the flow of data along as we build the app. To be able to use the IGDB API, you need to sign up for the API key for free from the link at IGDB: Free video Game Database API
Prerequisites to be able to build and run the app:
- Latest installation of Xcode 11 Beta (Beta 5 as of this article is written).
- macOS 10.14.6 or latest.
I already setup a starter project to download, it has several components:
- IGDB-SWIFT-API pod. IGDB wrapper for Swift used to make API request to IGDB API.
- GameService/GameStore. The API that we will use to request latest games and game detail using IGDB wrapper.
- Game. The model that represent a video game title.
- Platform. An enum that represent video game platform such as PS4, Xbox One, and Nintendo Switch.
You can download it from the GitHub repository link at alfianlosari/SwiftUI-GameDB-Starter
After you download it, navigate to the project directory using your Terminal and run pod install . Open the project xcworkspace, then open the GameStore.swift file and paste your IGDB API key in line 19 inside the $0.userKey variable assignment. That’s all for the setup, let’s begin to build our app!
Building Game List View
Let’s build our first SwiftUI View, the GameListView. Create a new file called GameListView.swift . In the body, we use NavigationView to embed the List . For starting, we put Text containing Hello List.
struct GameListView: View {  var body: some View {
    NavigationView {
      List {
        Text("Hello List")
      }
    }
  }
}
Go to SceneDelegate.swift , update the initialization of UIHostingController by passing the GameListView in the rootView parameter. This will uses GameListView as the root view of the app. Try to build and run the app in simulator to see your SwiftUI app running!
...func scene(_ scene: UIScene, willConnectTo session: UISceneSession, options connectionOptions: UIScene.ConnectionOptions) {
  ...
  window.rootViewController = UIHostingController(rootView: GameListView())
  ...
}
Flow of Data in SwiftUI Introduction
The flow of data in SwiftUI is different than the flow of data that we usually use in imperative programming (MVC, VIPER, etc). The SwiftUI is more similar to MVVM, which observes states of your data model and update the View whenever the states value is updated. It also uses Bindings for bidirectional communications, for example we can bind the state of variable with boolean value to a Switch control so the whenever user the switch the value of the variable will get updated.
SwiftUI uses property wrapper for variable state declaration that will be stored and connected to the SwiftUI View. Whenever those properties get updated, View will update its appearance to match the state of the data model in the variable.
Here are several type of basic property wrappers for data available to use in SwiftUI:
- @State . Storage of the property will be managed by SwiftUI. Whenever the value updates, the View will update the appearance inside the declaration of body. It’s the source of truth for the data inside a View.
- @Binding. A binding property from a state, it can be used to pass value of a state to other View down in the hierarchy using the $ prefix operator. The View that gets the binding will be able to mutate the value and the View that has the state will be updated to reflect the changes in the data. Example, passing down the bind of boolean state to a Switch control that will be updated whenever the user toggles the switch on/off.
- @ObservedObject . This is a property that represent the model in the View. The class needs to conform to ObservableObject protocol and invoke objectWillChange whenever the properties are updated. SwiftUI will observes the changes in the model and update the appearance inside the declaration of the body. In Xcode 11 Beta 5, we can declare the properties with @Published property wrapper for the object to magically publish the update to the View.
- @EnvironmentObject. It acts just like the @ObservedObject , but in this case we can retrieve the object from the deepest child View up to the top ancestor/root View.
Fetching List from IGDB API and Observe with SwiftUI
Next, we will fetch the list of games from IGDB API. Let’s create a GameList class that conforms to ObservableObject protocol. We declare several properties such as isLoading for the View to display a loading indicator if the value is true and games array containing the list of games that we will retrieve using IGDB API. Those properties are declared using the @Published property wrapper so it can notify the View when the value is updated. The gameService property will be used to retrieve the game list from IGDB API.
Next, we declare a single method called reload that accepts a parameter for the platform that we will use to fetch the video game. It has ps4 as its default value. In the implementation, we set the games array to empty and set isLoading state to true, then invoke the fetchPopularGames method from gameService passing the platform. In the completion handler, we set isLoading to false and check the result enum. If it is success, we retrieve the associated value containing the games and assign it the games instance property.
class GameList: ObservableObject {

    @Published var games: [Game] = []
    @Published var isLoading = false

    var gameService = GameStore.shared

    func reload(platform: Platform = .ps4) {
        self.games = []
        self.isLoading = true

        gameService.fetchPopularGames(for: platform) { [weak self]  (result) in
            self?.isLoading = false

            switch result {
            case .success(let games):
                self?.games = games

            case .failure(let error):
                print(error.localizedDescription)
            }
        }
    }
}
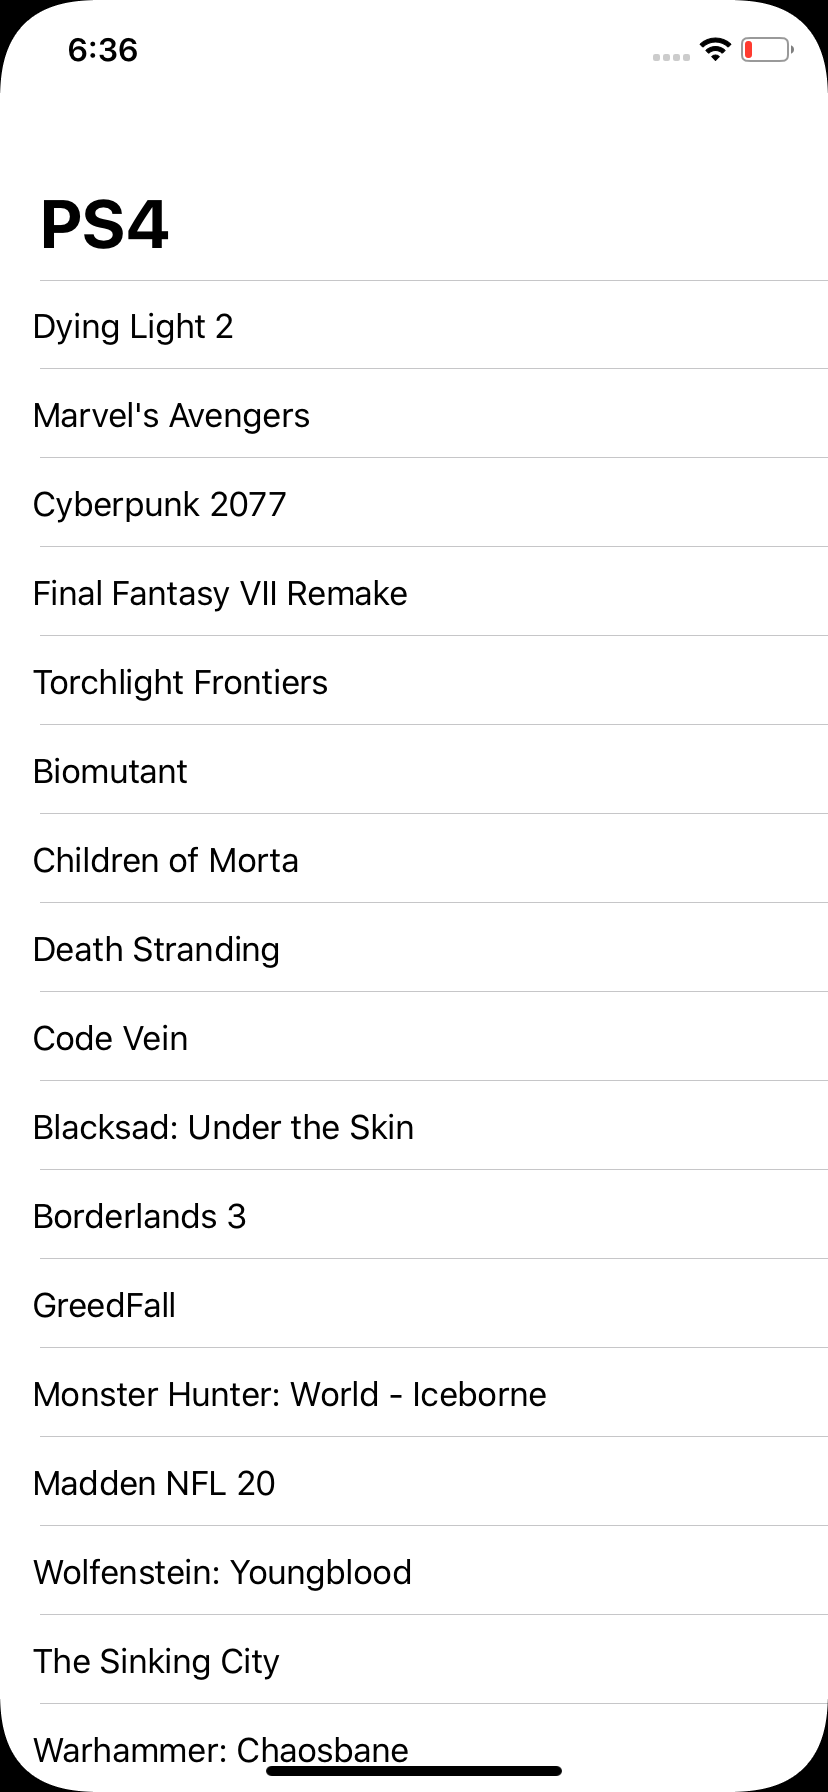
Next, let’s integrate the GameList model into the GameListView . We simply add a property using the @ObservedObject property wrapper for the gameList. Inside the Group layout, we check if the gameList isLoading is set to true, then we simply display a Text with loading as the message. Otherwise, we initialize List passing the games array from the gameList . Game model already conforms to Identifiable protocol so it can be used as a diffing whenever the array gets updated. For now, we just display the name of the game using Text in each row of the list.
struct GameListView: View {  @ObservedObject var gameList: GameList = GameList()  var body: some View {
    NavigationView {
      Group {
        if gameList.isLoading {
          Text("Loading")
        } else {
          List(gameList.games) { game in
            Text(game.name)
          }
        }
      }
    }.onAppear {
      self.gameList.reload()
    }
  }
}
To trigger the loading of the API, we use the onAppear modifier in the NavigationView . The closure inside will be invoked, only when the view gets rendered on the screen. Try to build and run the app to see the list of games fetched from the remote API and displayed on the list!
Building LoadingView by hosting UIKit UIActivityIndicatorView in SwiftUI
As of right now, SwiftUI doesn’t have an activity indicator View that we can use to show loading indicator like the UIActivityIndicatorView in UIKit.We can use UIKit component in our app by conforming to UIViewControllerRepresentable to wrap UIViewController and UIViewRepresentable for UIView.
Let’s create LoadingView wrapper for UIActivityIndicatorView. This LoadingView conforms to UIViewRepresentable and need to implement 2 methods. In the makeUIView: , we initialize UIActivityIndicatorView and return it. Then in updateUIView, we start animating the activity indicator. It’s using associatedtype under the hood for the UIView generic placeholder inside the protocol.
import SwiftUI
import UIKit

struct LoadingView: UIViewRepresentable {
  func makeUIView(context: UIViewRepresentableContext<ProgressView>) -> UIActivityIndicatorView {
    let activityIndicator = UIActivityIndicatorView(style: .medium)
    return activityIndicator
  }

  func updateUIView(_ uiView: UIActivityIndicatorView, context: UIViewRepresentableContext<ProgressView>) {
    uiView.startAnimating()
  }
}
Just replace the Text with loading message with our new LoadingView to see it is working in perfectly!
//...
if gameList.isLoading {
  LoadingView()
} else {
  //...
}
Fetch Remote Image from URL with SwiftUI
Before we start to improve the UI of the row in the List, we need to create an ImageLoader ObservableObject for loading image in the View. It’s has a static NSCache dictionary that we can use to create a simply image caching mechanism using the url string as the key and UIImage as the value. The only @Published property that we use is the image property that exposes the UIImage to be observed. In the downloadImage(url:) method, we retrieve the absolute string of the url, then retrieve the image from the cache using the url if it is exists. If not exists, we just use URLSession to retrieve the image using the url, assign it to the cache, then assign it to the image property.
class ImageLoader: ObservableObject {

    private static let imageCache = NSCache<AnyObject, AnyObject>()

    @Published var image: UIImage? = nil

    public func downloadImage(url: URL) {
        let urlString = url.absoluteString

        if let imageFromCache = ImageLoader.imageCache.object(forKey: urlString as AnyObject) as? UIImage {
            self.image = imageFromCache
            return
        }

        URLSession.shared.dataTask(with: url) { (data, res, error) in
            guard let data = data, let image = UIImage(data: data) else {
                return
            }
            DispatchQueue.main.async { [weak self] in
                ImageLoader.imageCache.setObject(image, forKey: urlString  as AnyObject)
                self?.image = image
            }
        }.resume()
    }
}
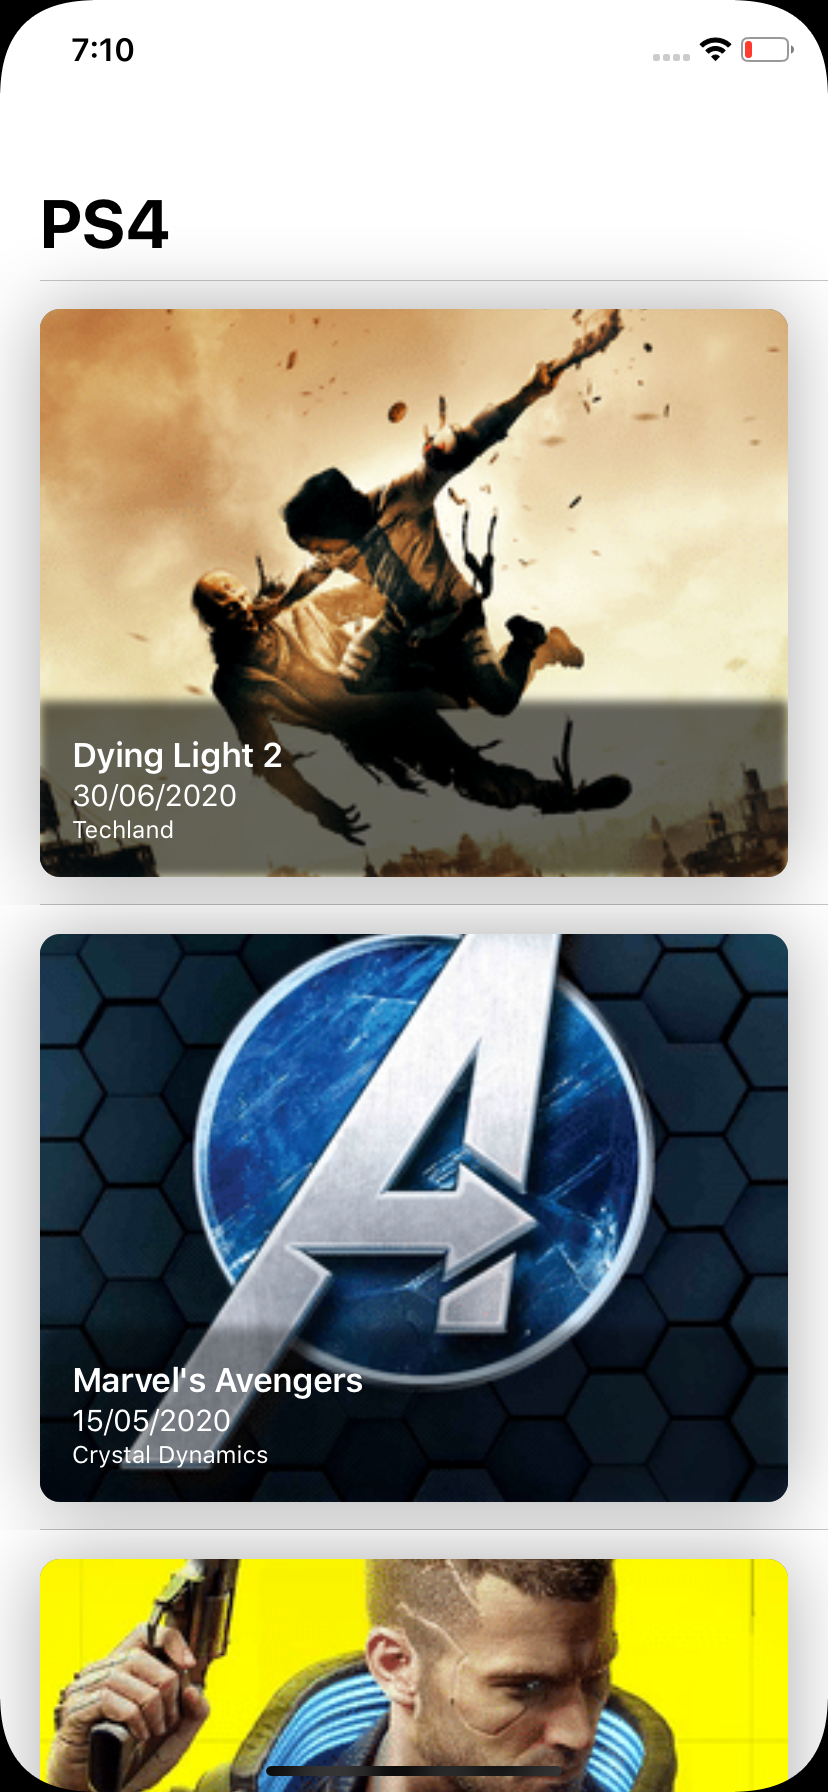
Building Game Row View
Next, we create a GameRowView that will represent each row of the game in our List. It has 2 property, one is the game property and the other one is the ImageLoader property that we will use with @ObserverdObject property wrapper.
Inside the body, we use ZStack to overlay the views on top of another. The most bottom view will be the Image, then on top of that we use VStack to stack the Texts vertically. We display the name, release data, and publisher of the game. We assert the ImageLoader if the image is exists, then we display the Image and resize it properly using SwiftUI modifiers. Try to play around with the value of modifiers to customize the View!. At last, we add onAppear modifier in the row, so it will only fetch the image when the row is displayed on the screen.
import SwiftUI

struct GameRowView: View {

    var game: Game
    @ObservedObject var imageLoader: ImageLoader = ImageLoader()

    var body: some View {
        ZStack(alignment: .bottomLeading) {
            if (imageLoader.image != nil) {
                GeometryReader { geometry in
                    Image(uiImage: self.imageLoader.image!)
                        .resizable(resizingMode: Image.ResizingMode.stretch)
                        .aspectRatio(contentMode: .fill)
                        .frame(maxWidth: geometry.size.width)
                        .clipped()
                }
            }
            VStack(alignment: .leading) {
                Text(game.name)
                    .font(.headline)
                    .foregroundColor(Color.white)
                    .lineLimit(1)
                Text(game.releaseDateText)
                    .font(.subheadline)
                    .foregroundColor(Color.white)
                    .lineLimit(2)
                Text(game.company)
                    .font(.caption)
                    .foregroundColor(Color.white)
                    .lineLimit(1)
            }
            .frame(maxWidth: .infinity, alignment: .bottomLeading)
            .padding(EdgeInsets.init(top: 16, leading: 16, bottom: 16, trailing: 16))
            .background(Rectangle().foregroundColor(Color.black).opacity(0.6).blur(radius: 2.5))
        }
        .background(Color.secondary)
        .cornerRadius(10)
        .shadow(radius: 20)
        .padding(EdgeInsets.init(top: 8, leading: 0, bottom: 8, trailing: 0))
        .frame(height: 300)
        .onAppear {
            if let url = self.game.coverURL {
                self.imageLoader.downloadImage(url: url)
            }
        }
    }
}
Replace the Text inside the List with GameRowView passing the game as the parameter for initalizer.
//..
List(self.gameList.games) { (game: Game) in
  GameRowView(game: game)
}
Finally, remove the GameRowView_Previews right now so our project can be build and run!. We do this because we don’t have a stub game to pass in Debug for the live preview to render.
Building and Navigate to Game Detail View
Next, we create GameDetailView . This view will display the full image poster of the game, summary, storyline, and other additional information. It will accept the id of the game as the parameter so we can use it to fetch the game metadata from the API when the view get pushed on the navigation stack. For now let’s display the id in the screen with Text . Also, just remove the GameDetailView_Previews for now so it can be build and run.
struct GameDetailView: View {
  var gameId: Int
  var body: some View {
    Text(String(gameId))
  }
}
Next, we add NavigationLink and pass the GameDetailView to the destination parameter inside the list in GameListView like so.
//...
List(self.gameList.games) { (game: Game) in
  NavigationLink(destination: GameDetailView(gameDetail:
GameDetail(gameService: GameStore.shared), gameId: game.id)) {
    GameRowView(game: game)
  }
}
Try to build and run the app, then tap on the row in the list to navigate to GameDetailView successfully 😋!
Fetching Game Detail from IGDB API and Observe with SwiftUI
Just like the GameListView , we need to fetch the detail of the game from the IGDB API. We create GameDetail object and conforms to ObservableObject protocol. We’ll declare 2 properties using @Published property wrapper, one for loading state and the other one for storing the fetched game.
In the reload method, we pass the id of the game as the parameter. We fetch the detail of the game using the GameService object. In the completion, we assign the game property with the game we successfully fetched from the API.
class GameDetail: ObservableObject {

    @Published var game: Game? = nil
    @Published var isLoading = false

    var gameService: GameService = GameStore.shared

    func reload(id: Int) {
        self.isLoading = true

        self.gameService.fetchGame(id: id) {[weak self] (result) in
            self?.isLoading = false

            switch result {
            case .success(let game):
                self?.game = game

            case .failure(let error):
                print(error.localizedDescription)
            }
        }
    }
}
Improving Game Detail View UI
Let’s put the GameDetail model in use inside the GameDetailView . We simply declare @ObservedProperty to store the GameDetail , also we need to the ImageLoader as well to load the poster image or the game.
struct GameDetailView: View {
  @ObservedObject var gameDetail = GameDetail()
  @ObservedObject var imageLoader = ImageLoader()  var gameId: Int  //...
}
In the body of the view, we create a List and put the Image on the top followed by a section containing all of the texts for storyline, summary, etc. We only load the image when the game is successfully fetched.
You can see all the declarative implementation of the UI from the snippet below. In this snippet you can see that we can create composable small views to build a larger view. The poster view and game section are views.
struct GameDetailView: View {

    @ObservedObject var gameDetail = GameDetail()
    @ObservedObject var imageLoader = ImageLoader()

    var gameId: Int

    var body: some View {
        Group {
            if (self.gameDetail.game != nil) {
               List {
                    PosterView(image: self.imageLoader.image)
                        .onAppear {
                            if let url = self.gameDetail.game?.coverURL {
                                self.imageLoader.downloadImage(url: url)
                            }
                    }

                    GameSectionView(game: self.gameDetail.game!)
                }
            } else {
                ProgressView()
            }
        }
        .edgesIgnoringSafeArea([.top])
        .onAppear {
            self.gameDetail.reload(id: self.gameId)
        }
    }
}

struct PosterView: View {

    var image: UIImage?
    var body: some View {
        ZStack {
            Rectangle()
                .foregroundColor(.gray)
                .aspectRatio(500/750, contentMode: .fit)

            if (image != nil) {
                Image(uiImage: self.image!)
                    .resizable()
                    .aspectRatio(500/750, contentMode: .fit)
            }
        }

    }

}


struct GameSectionView: View {

    var game: Game

    var body: some View {
        Section {
            Text(game.summary)
                .font(.body)
                .lineLimit(nil)

            if (!game.storyline.isEmpty) {
                Text(game.storyline)
                    .font(.body)
                    .lineLimit(nil)

            }
            Text(game.genreText)
                .font(.subheadline)
            Text(game.releaseDateText)
                .font(.subheadline)
            Text(game.company)
                .font(.subheadline)
        }
    }
}
Build and run the app to see the game information in its glory 🎮😁

One more thing! TabView in SwiftUI
For the grand finale, we will embed 3 GameListView into a TabView . Each of the view will display games for specific platform such as PS4, Xbox One, and Nintendo Switch. Before we add the view, let’s refactor GameListView to accept platform as the parameter in the initializer. Also in the onAppear , we pass the platform to the GameList reload method so it can fetch the game list for specific platform.
struct GameListView: View {

    @ObservedObject var gameList: GameList = GameList()
    var platform: Platform = .ps4

    var body: some View {
        NavigationView {
            Group {
                if gameList.isLoading {
                    ProgressView()
                } else {
                    List(self.gameList.games) { (game: Game) in
                        NavigationLink(destination: GameDetailView(gameId: game.id)) {
                            GameRowView(game: game)
                        }
                    }
                }
            }
            .navigationBarTitle(self.platform.description)
        }
        .onAppear {
            if self.gameList.games.isEmpty {
                self.gameList.reload(platform: self.platform)
            }
        }
    }
}
We create a GameRootView . In the body implementation, we use TabView , the use ForEach passing all of our platform enum cases , and inside the closure we declare the GameListView assigning the platform to the initializer. We also use modifiers to set the tag, tab item image asset name and text. PS: i already included the asset logo for each platform in xcassets.
import SwiftUI

struct GameRootView: View {

    var body: some View {
        TabView {
            ForEach(Platform.allCases, id: \.self) { p in
                GameListView(platform: p).tag(p)
                    .tabItem {
                        Image(p.assetName)
                        Text(p.description)
                }
            }
        }
        .edgesIgnoringSafeArea(.top)
    }
}
Finally, go to SceneDelegate.swift and replace the assignment of root view for UIHostingController with GameRootView.
...func scene(_ scene: UIScene, willConnectTo session: UISceneSession, options connectionOptions: UIScene.ConnectionOptions) {
  ...
  window.rootViewController = UIHostingController(rootView: GameRootView())
  ...
}
Build and run your project to see the tab view containing all the platforms!

Conclusion
That’s it fellow Swifters! our SwiftUI app is finished and ready to use to fetch your latest video games information. SwiftUI really makes building the user interface our app pretty simple and straightforward using it’s declarative syntax. The data is flowing using state, binding, and observable without us need to do it imperatively as we used to be when using UIKit. SwiftUI is also compatible with UIKit component using UIViewRepresentable and UIViewControllerRepresentable, so we can still use the good old UIKit component in our SwiftUI app!.
Just one more final thing, i am currently waiting for Dragon Quest XI S, Death Stranding, and Final Fantasy VII Remake to be released 😋. Until then, let’s keep on gaming and keep the lifelong learning goes on!. Happy Swifting!!!.
You can download the completed project from the GitHub repository at alfianlosari/SwiftUI-GameDB-Completed