Deploy Swift HTTP Serverless Container to Google Cloud Run in 5 minutes
Published at Apr 23, 2019

At Google Cloud Next 2019, Google has just introduced Google Cloud Run. It’s a serverless computing service, which means we don’t have to manage the infrastructure by ourselves. It is based on containers, so we only need to provide the Dockerfile that contains our HTTP server application and deploy. The service will be invocable via the HTTP request from the client and the payment will be using pay per use model.
There are many features that Google Cloud provides for the Cloud Run, such as:
- Fast autoscaling, automatically scales our app up and down based on the traffic. Container based, using Docker container to build and deploy our service.
- No DevOps. All we need to do is deploy our container and Google Cloud will manage all the rest for us.
- Based on Knative, the portability means we can also deploy to Google Kubernetes Engine (GKE Cluster) across platforms.
- Integrated logging and monitoring with StackDriver.
- Ability to use our own custom domains.
You can learn more about the Cloud Run directly from Google with the official link Cloud Run | Google Cloud.
What we will build
In this article, we will deploy a simple Swift HTTP Server app to Google Cloud Run using Dockerfile. We will use the Google Cloud SDK with Command Line for this. There are only 4 main tasks that we need to perform:
- Prepare our HTTP Swift app.
- Build the Dockerfile.
- Upload to Container Registry.
- Deploy container to Google Cloud Run.
Setting up Google Cloud
Before you begin, here are the things that you require to have: 1. Register and Sign in to the Google Cloud Platform. (https://console.cloud.google.com/). 2. Download and install Google Cloud SDK to your machine. (https://cloud.google.com/sdk/install). 3. Create a new project from the Google Cloud Console. 4. Make sure to follow all these steps in here to activate the Google Cloud Run API for your project. (https://cloud.google.com/run/docs/setup).
Prepare our HTTP Swift Application
Open your terminal/shell, create a new directory named hello-swift-cloudrun and navigate to that directory.
mkdir hello-swift-cloudrun
cd hello-swift-cloudrun
Inside the directory, create a new swift package.
swift package init --type executable
Next, open Package.swift and copy the following code into the file. We will add the Swifter tiny HTTP server library as the dependency to run our HTTP Server in Swift.
/ swift-tools-version:5.0
// The swift-tools-version declares the minimum version of Swift required to build this package.import PackageDescriptionlet package = Package(
    name: "hello-swift-cloudrun",
    dependencies: [
        .package(url: "https://github.com/httpswift/swifter.git", .upToNextMajor(from: "1.4.6"))
    ],
    targets: [
        .target(
            name: "hello-swift-cloudrun",
            dependencies: ["Swifter"]),
        .testTarget(
            name: "hello-swift-cloudrunTests",
            dependencies: ["hello-swift-cloudrun"]),
    .]
)
Next, open the main.swift file from the Sources directory. Copy the following code.
import Swifter
import Dispatch
import Foundation

let dateFormatter = DateFormatter()
dateFormatter.locale = Locale(identifier: "en_US")
dateFormatter.dateStyle = .full
dateFormatter.timeStyle = .full

let server = HttpServer()
server["/html"] = { req -> HttpResponse in
    return .ok(.html("""
        <h1>Swift Hello World from Google Cloud Run Serverless</h1>
        <p>Current time is \(dateFormatter.string(from: Date()))</p>
    """))
}

server["/api"] = { req -> HttpResponse in
    return .ok(.json([
        "result": """
        Swift Hello World from Google Cloud Run Serverless\n
        Current time is \(dateFormatter.string(from: Date()))
        """
        ] as AnyObject))
}

let semaphore = DispatchSemaphore(value: 0)
do {
    let port: Int = Int(ProcessInfo.processInfo.environment["PORT"] ?? "8080") ?? 8080

    try server.start(UInt16(port))
    print("Server has started ( port = \(try server.port()) ). Try to connect now...")
    semaphore.wait()
} catch {
    print("Server start error: \(error)")
    semaphore.signal()
}
Here are the things that it performs:
- Register 2 routes /html and /api. These routes will return the response containing the current date that is formatted using DateFormatter. The html path will return the text in HTML format, while the api path will return the response in JSON format.
- Retrieve the PORT from the environment variable.
- Start the HTTPServer passing the PORT to listen for the request in the port.
Try to build and run the server by typing these commands the terminal.
swift build
swift run
To test, open your browser and navigate to the address http://localhost:8080/html. You should see the text printed with the current time in your browser.

.
Build the Dockerfile
Next, we will containerize our app by creating the Dockerfile. Create the file and copy the following code below.
FROM ibmcom/swift-ubuntu:latest
WORKDIR /usr/src/app
COPY . .
RUN swift build --configuration release
CMD [ "swift", "run", "--configuration", "release"  ]
This will copy all the file to the container image, then run the swift build using release configuration. It will also run the server after the build has been finished.
Upload to Container Registry
Next, we need to upload our container to Cloud Registry. Make sure to retrieve your project id for your project. Run the command below.
gcloud builds submit --tag gcr.io/[PROJECT-ID]/hello-swift-cloudrun
Wait for the container builds process to finish and then uploaded to container registry. It will print the success message to the terminal.
You can check the list of the successfully uploaded container using this command.
gcloud container images list
Deploy Container to Google Cloud Run
At last, we need the deploy the image to the Google Cloud Run. Type these following command.
gcloud config set run/region us-central1
gcloud beta run deploy --image gcr.io/[PROJECT-ID]/hello-swift-cloudrun --memory 512M --allow-unauthenticated
Here are several things that it performs:
- Set the region of deployment to us-central1.
- Deploy the image from the Container Registry path in this case hello-swift-cloudrun.
- Configure to use 512M of memory to use.
- Allow unauthenticated request to invoke the HTTP.
You can configure other things, from memory, concurrency, and request timeout. Check the link at Configuring memory limits | Cloud run | Google Cloud.
After the deployment finished successfully, the terminal will print the URL endpoint of the deployed service that we can use. Open your browse and navigate to:
- https://$URL/html
- https://$URL/api
Monitoring through Dashboard
You can view all your deployed services to Cloud Run fromt the console dashboard.
https://console.cloud.google.com/run
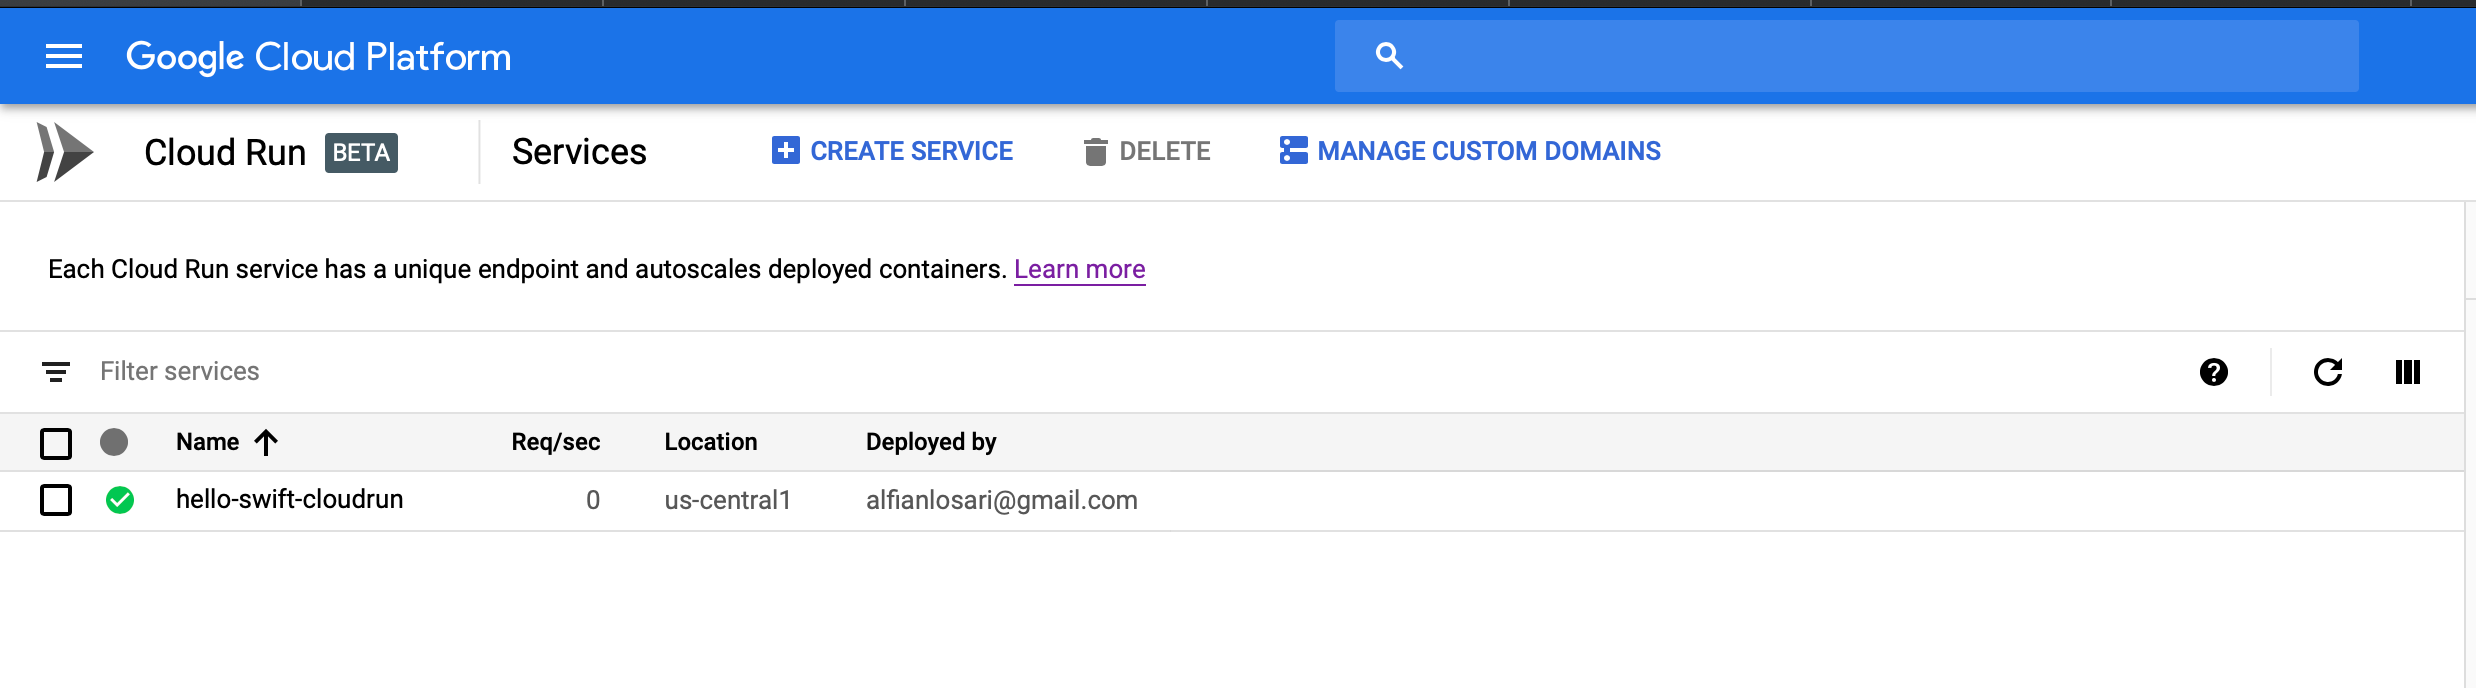
In here you can also manage the custom domains, delete and create services, and view the logs of your deployed services.
!!!Make sure to delete all the resources that you have created after you finish this article to avoid billings!!!
Conclusion
You can clone the completed project in the repository at alfianlosari/SwiftCloudRun.
That’s it, in just a simple steps we have deployed our serverless backend using Docker to the Google Cloud Run managed autoscaling service. The serverless paradigm provide us speed and reliability to execute rapidly as the size of our application grows over time ⚡️⚡️⚡️.